Revitalizing Hoop House Soils
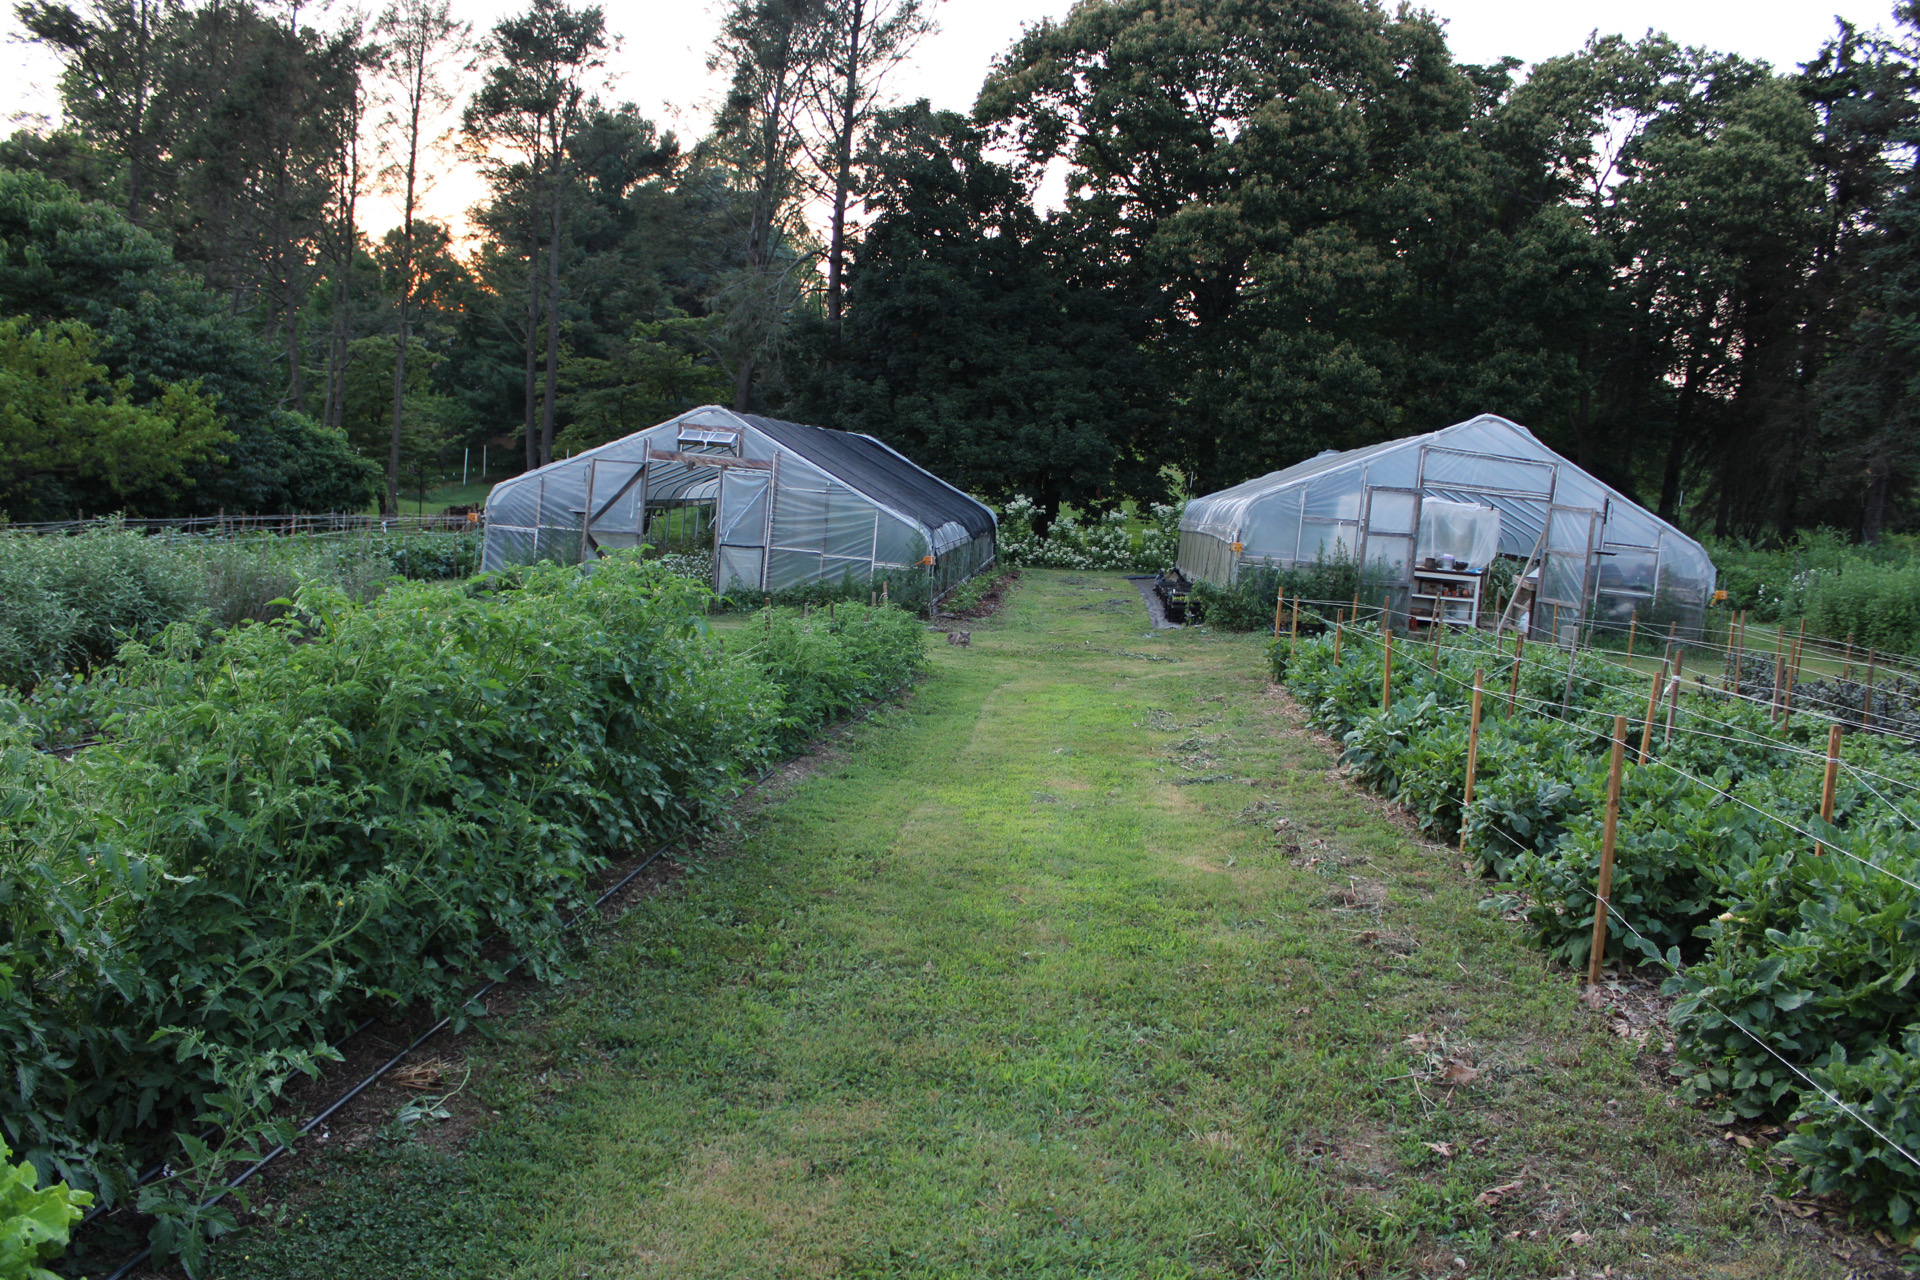
The soil in hoop houses typically gets very depleted over many years of crop production and revitalizing hoop house soils becomes a necessary focus as a farm matures. There are two unheated hoop houses at Love ‘n Fresh Flowers, both Gothic-style and measuring 24’ x 48’, giving us a little over 2,300 square feet under cover. The one house has been in production for nine seasons and the other for seven.
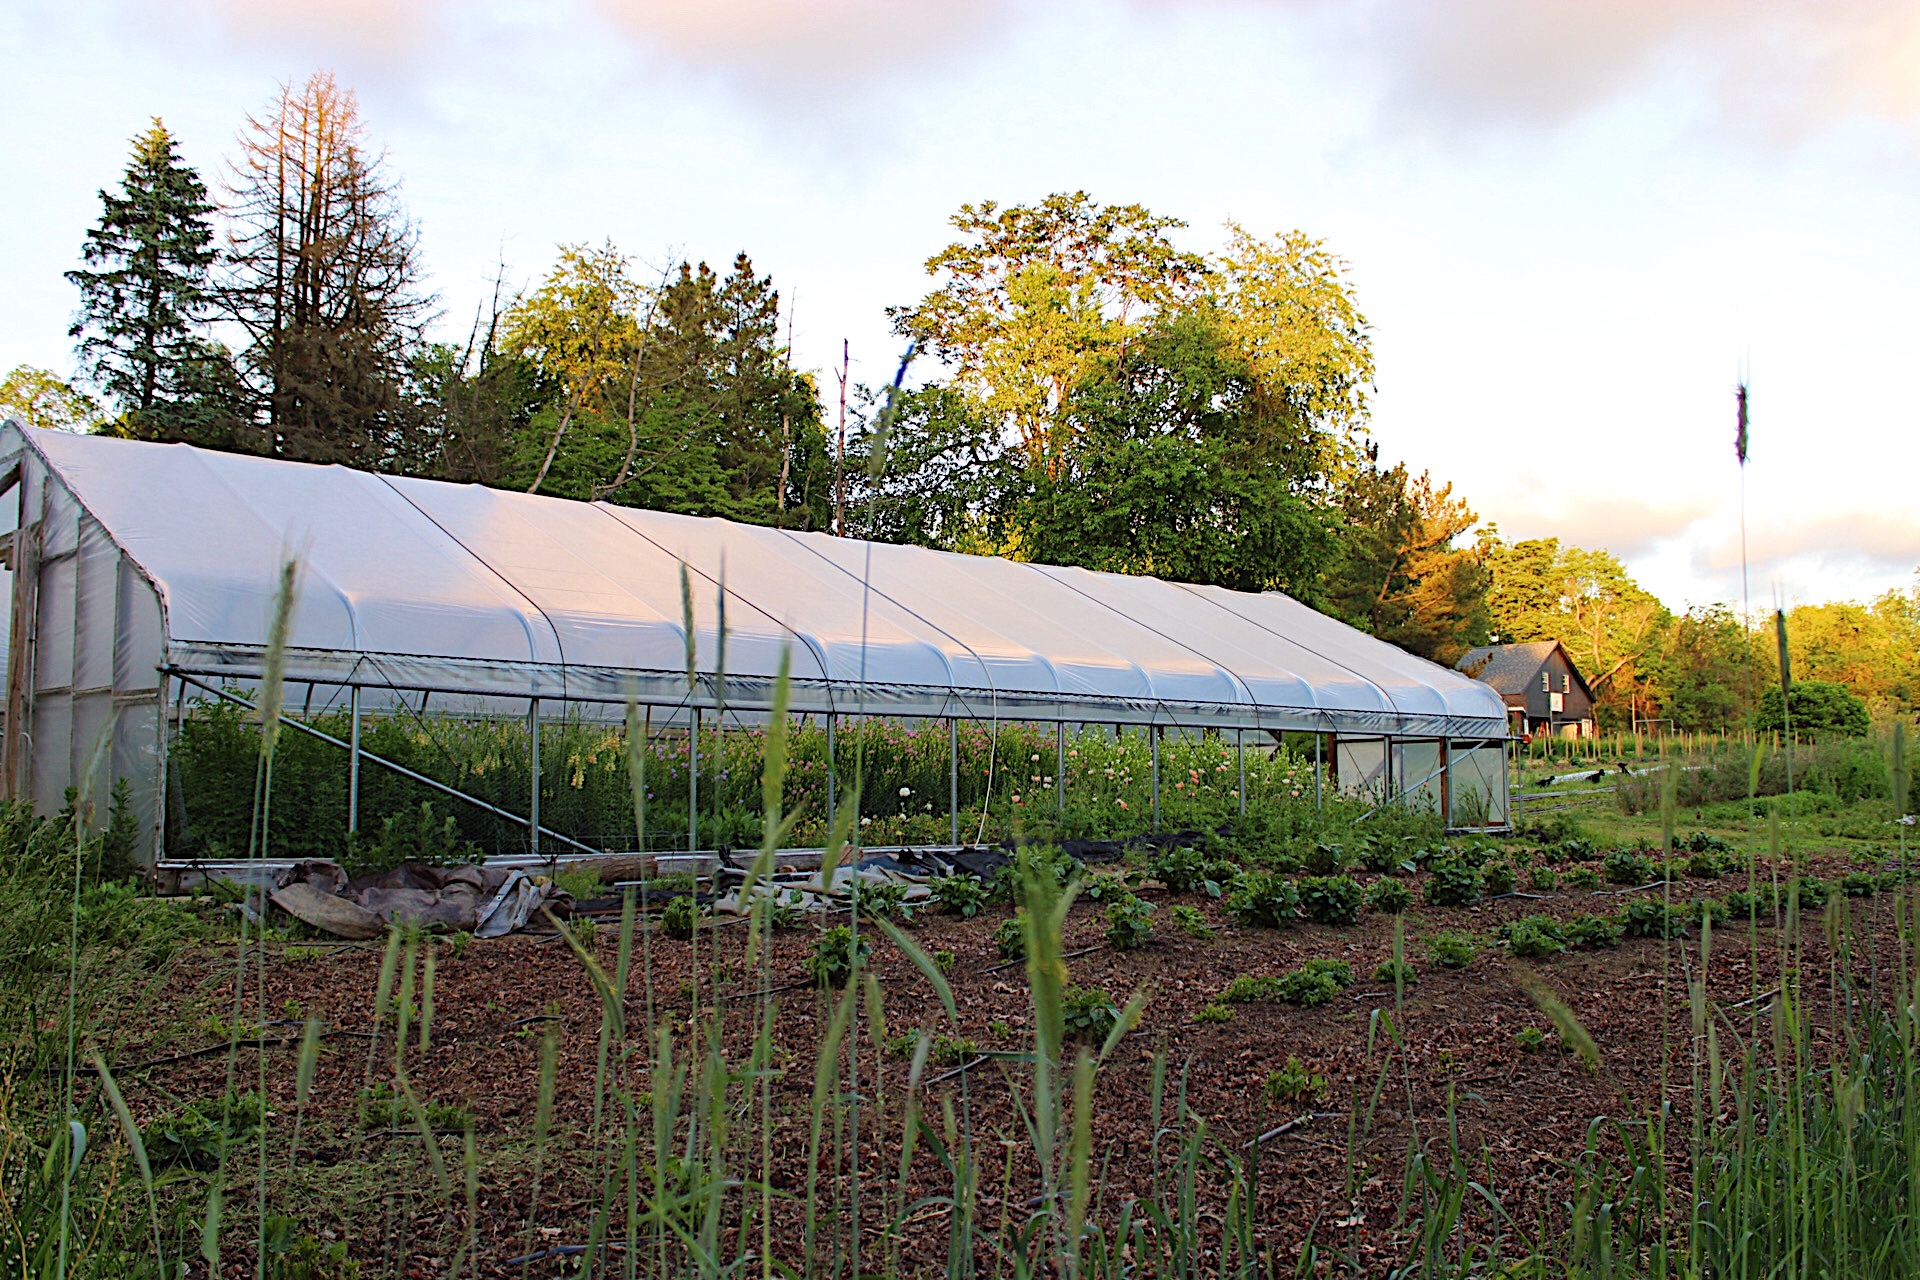
One of my hoop houses is dedicated to perennial foliage crops like eucalyptus and rosemary and is the prop house in spring; that house has been cranking for many years with little fuss or input. Each fall I put a layer of fresh leaves on the beds in that house, but otherwise not much goes into them since the plants are well-established with deep root systems that are able to mine their own minerals and moisture over the seasons.
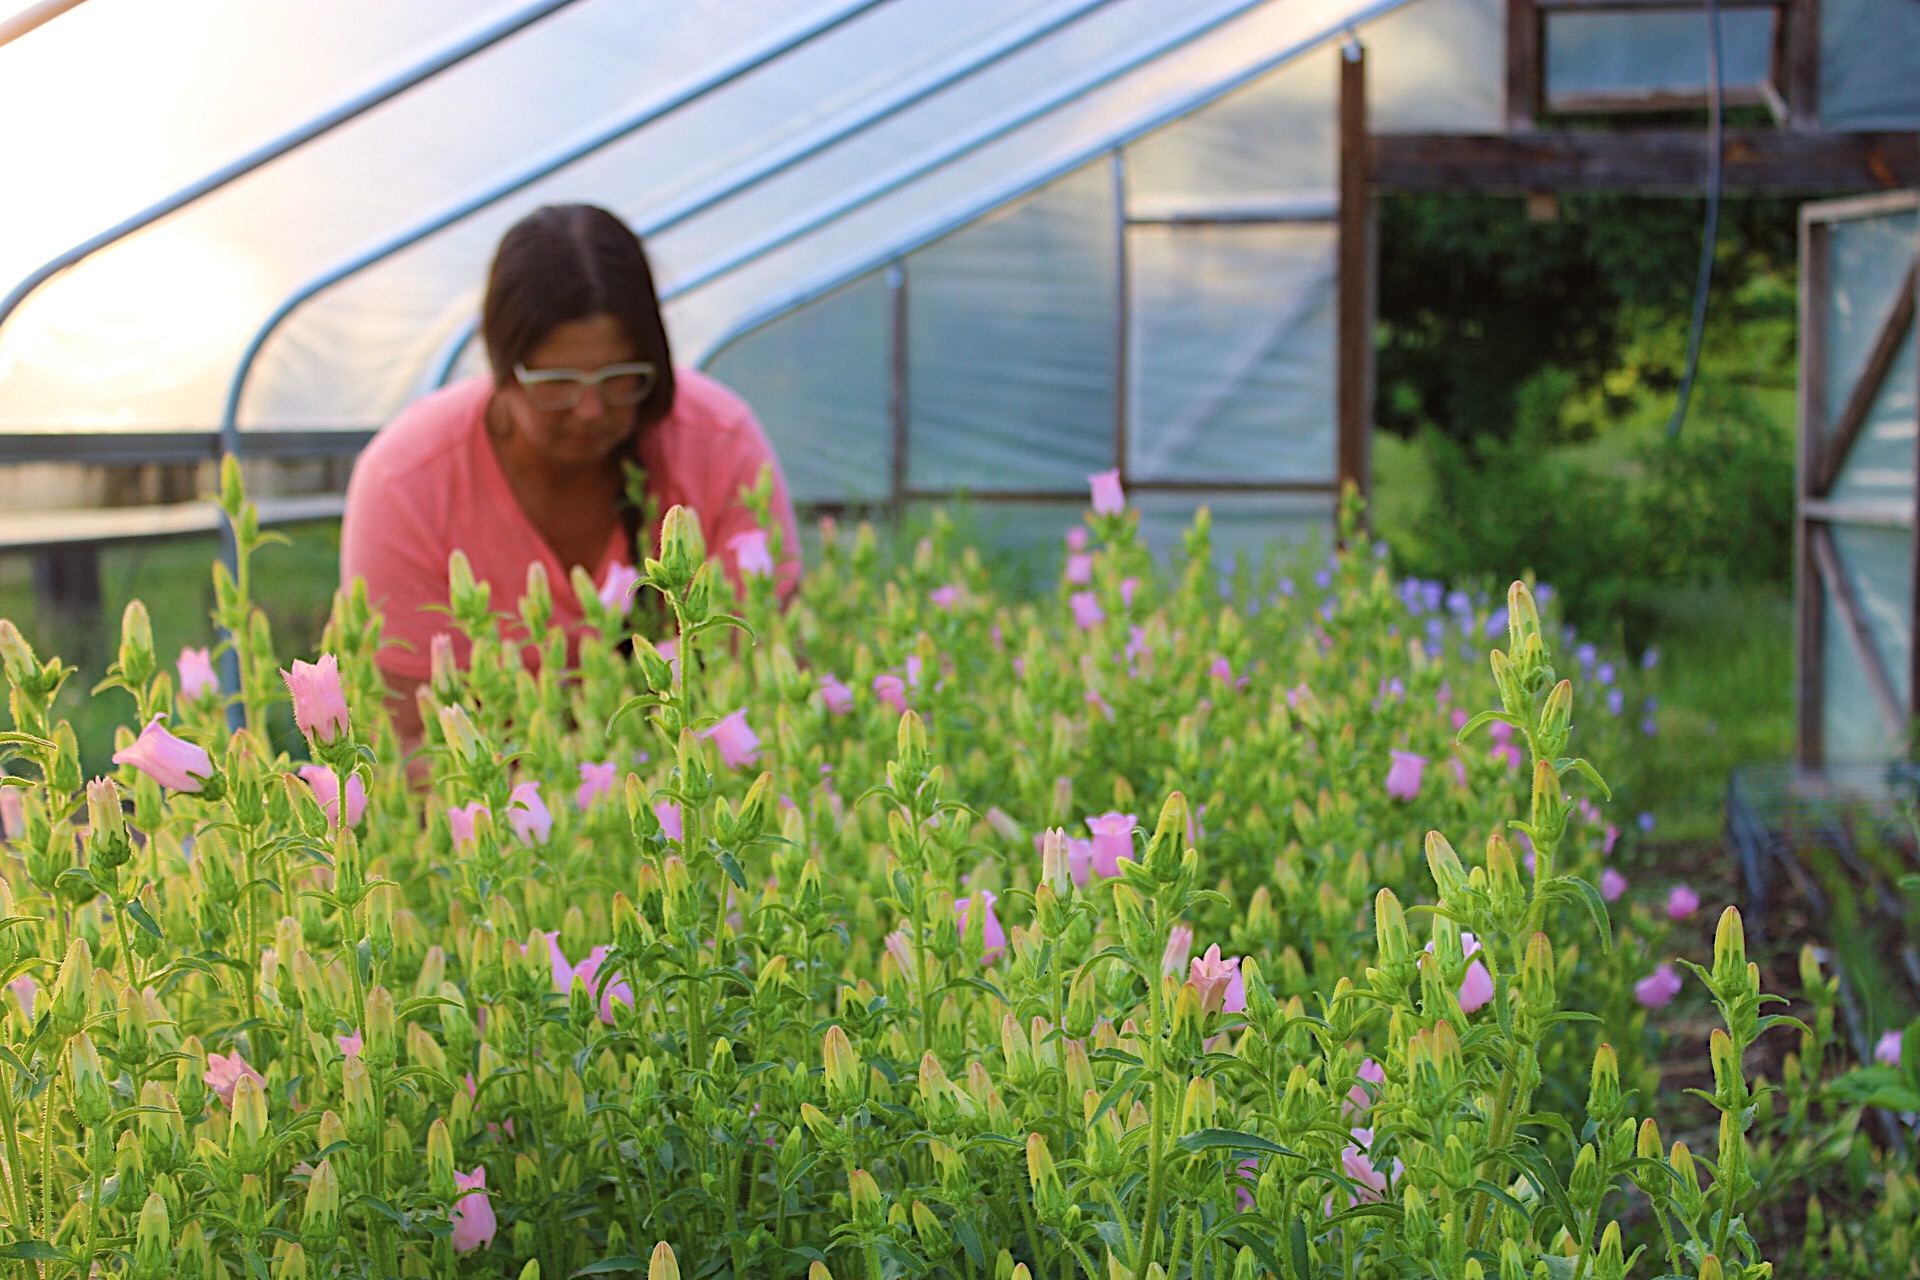
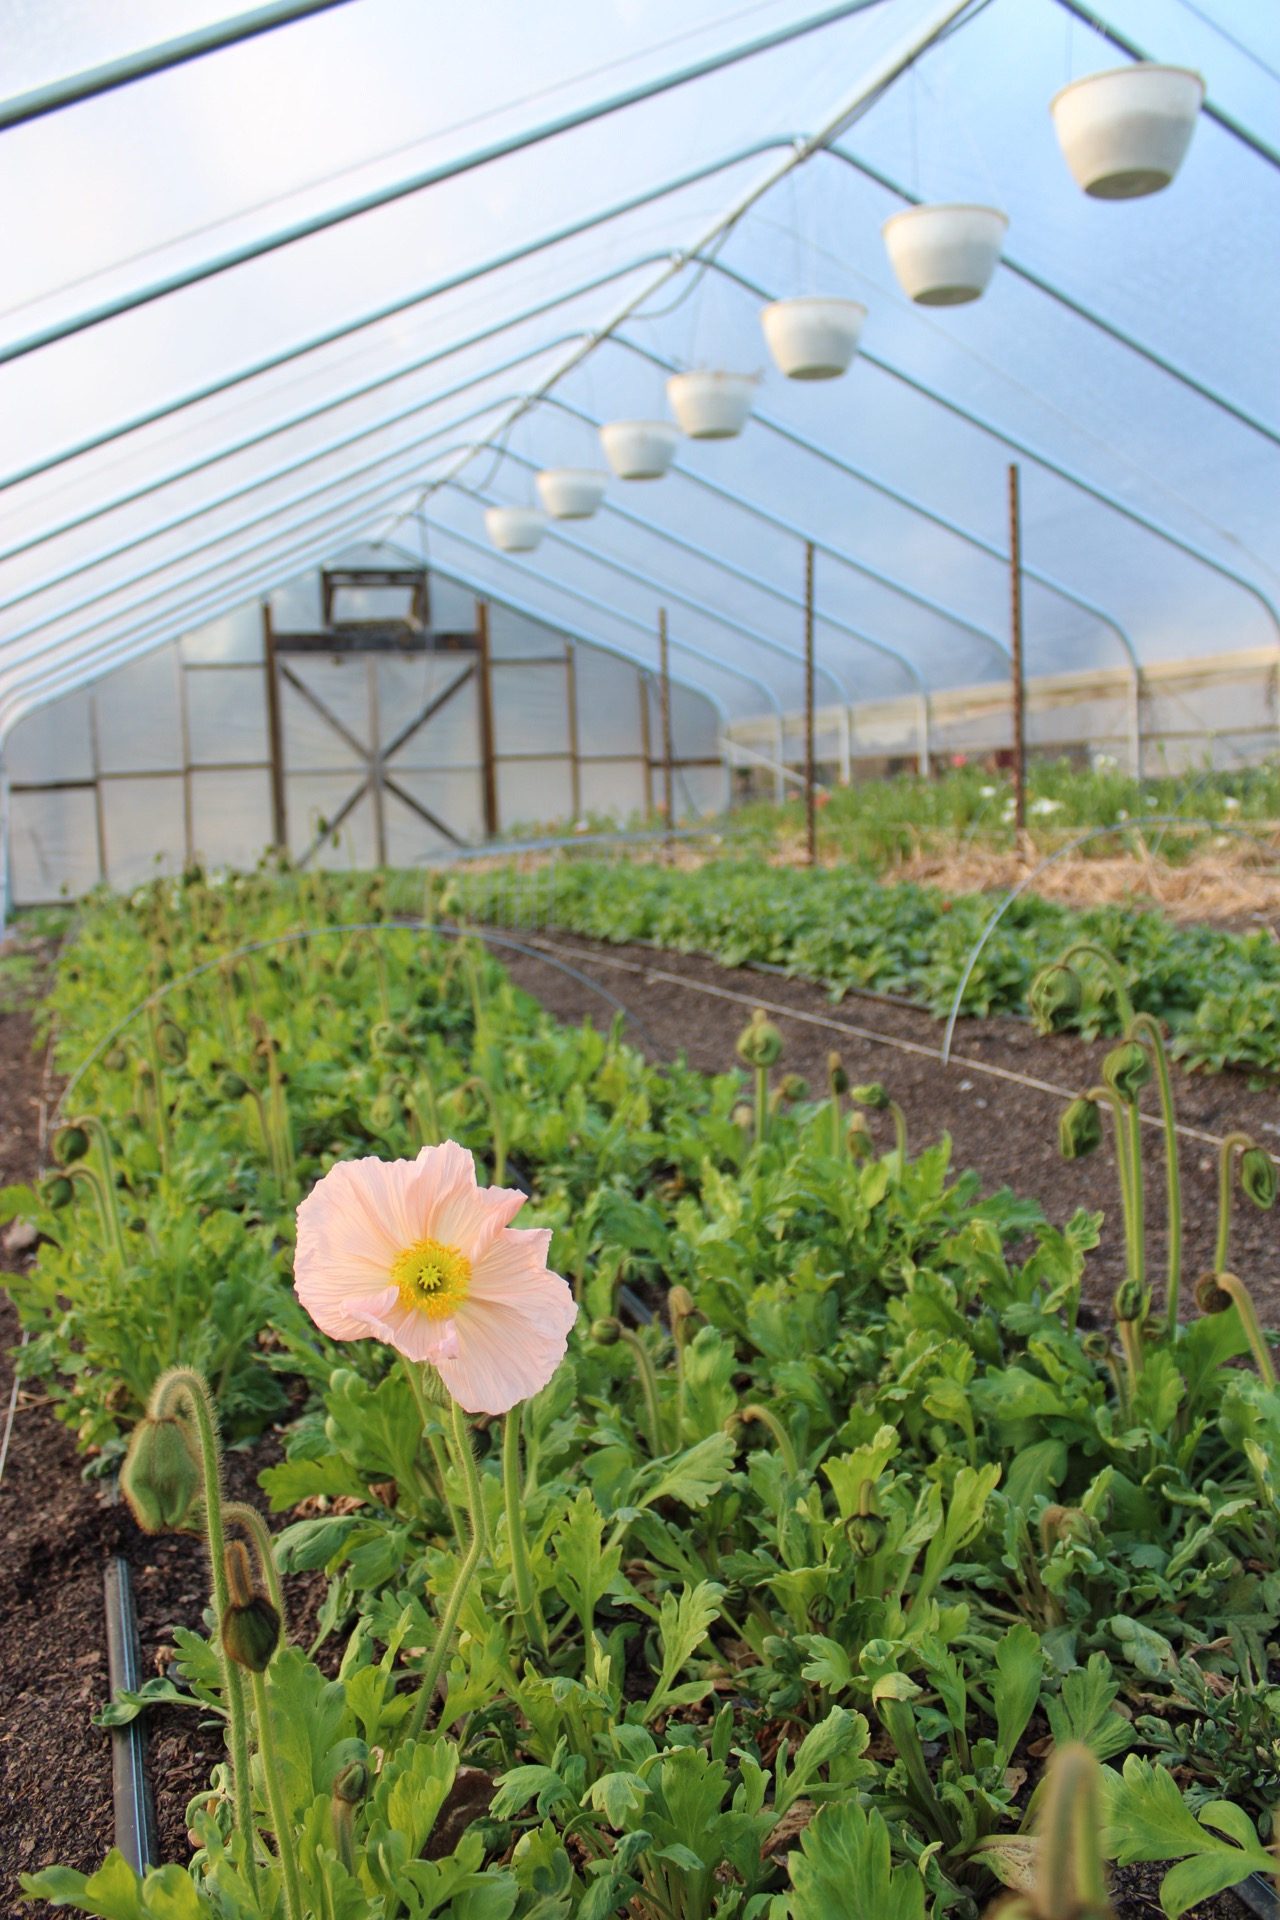
The other house is what I call my “Spring House”, with production being primarily focused on early spring blooms like ranunculus, anemones, poppies, campanula, sweet peas, stock, and snapdragons. Getting these flowers to harvest-stage in late March means Love ‘n Fresh Flowers is primed to provide florals for the popular spring wedding season here in Philadelphia, which runs April through June. If you haven’t already, be sure to grab a copy of Cool Flowers by flower farming guru, Lisa Mason Zeigler, to learn how to do maximize fall plantings for early spring blooms at your farm too.
It is this second hoop house that is the focus of this article. After seven seasons in production, I noticed a decided degradation in the soil, a marked increase in disease, and a frustratingly robust pest population in this house. Of those seven seasons in production, I had been tilling the soil for six. Because the house was such “valuable real estate”, I had neglected to give it any downtime for cover cropping or rest. Organic matter was low at 3% and the pH had creeped up.
In the early spring of 2019, the ranunculus in particular were a tragedy with massive amounts of root rot and an infestation of aphids. While it might be tempting to just purchase and apply formulated fungicides and pesticides to combat these issues, I realized those would be merely band-aids. The real problem was the soil. Without balanced and healthy soil for their foundation, the crops would continue to languish despite all the sprays I might use (for the record, we have never used any types of synthetic sprays here at Love ‘n Fresh Flowers).
The challenge with revitalizing hoop house soils is that you must take the hoop house “offline” to make any serious progress. A hoop house not in production would make many a farmer anxious. It’s prime real estate and some of the best money-making square footage on most small farms. But there comes a time when you can’t keep putting off the project of revitalizing hoop house soils. The key is to have a really solid game plan in place and make the most of your efforts! Many farmers will just take the “skin” (plastic) off a house and let it sit open to the elements for a summer, which does help leach out the salts. But you can do a lot more than that to renew the life and balance in your hoop house soil!
Steps Taken at Love ‘n Fresh Flowers to Revitalize Hoop House Soils
These steps were taken over the course of the 2019 growing season. Cash crops (ranunculus, anemones, sweet peas, stock, campanula, and snapdragons) were removed in late May and then those same cash crops were replanted in early November. The process described below took a little over five months.
After removing the cash crops in late May, all irrigation and other crop infrastructure was removed from the hoop house beds to create a blank slate. Any large weeds were pulled and removed from the house. The soil was broad-forked.
Buckwheat seed was broadcast across the entire surface of the soil in the hoop house to be a quick-turn cover crop. A metal rake was used to scratch the seed into the surface and it was watered in with a hose. This was Round 1 of buckwheat.
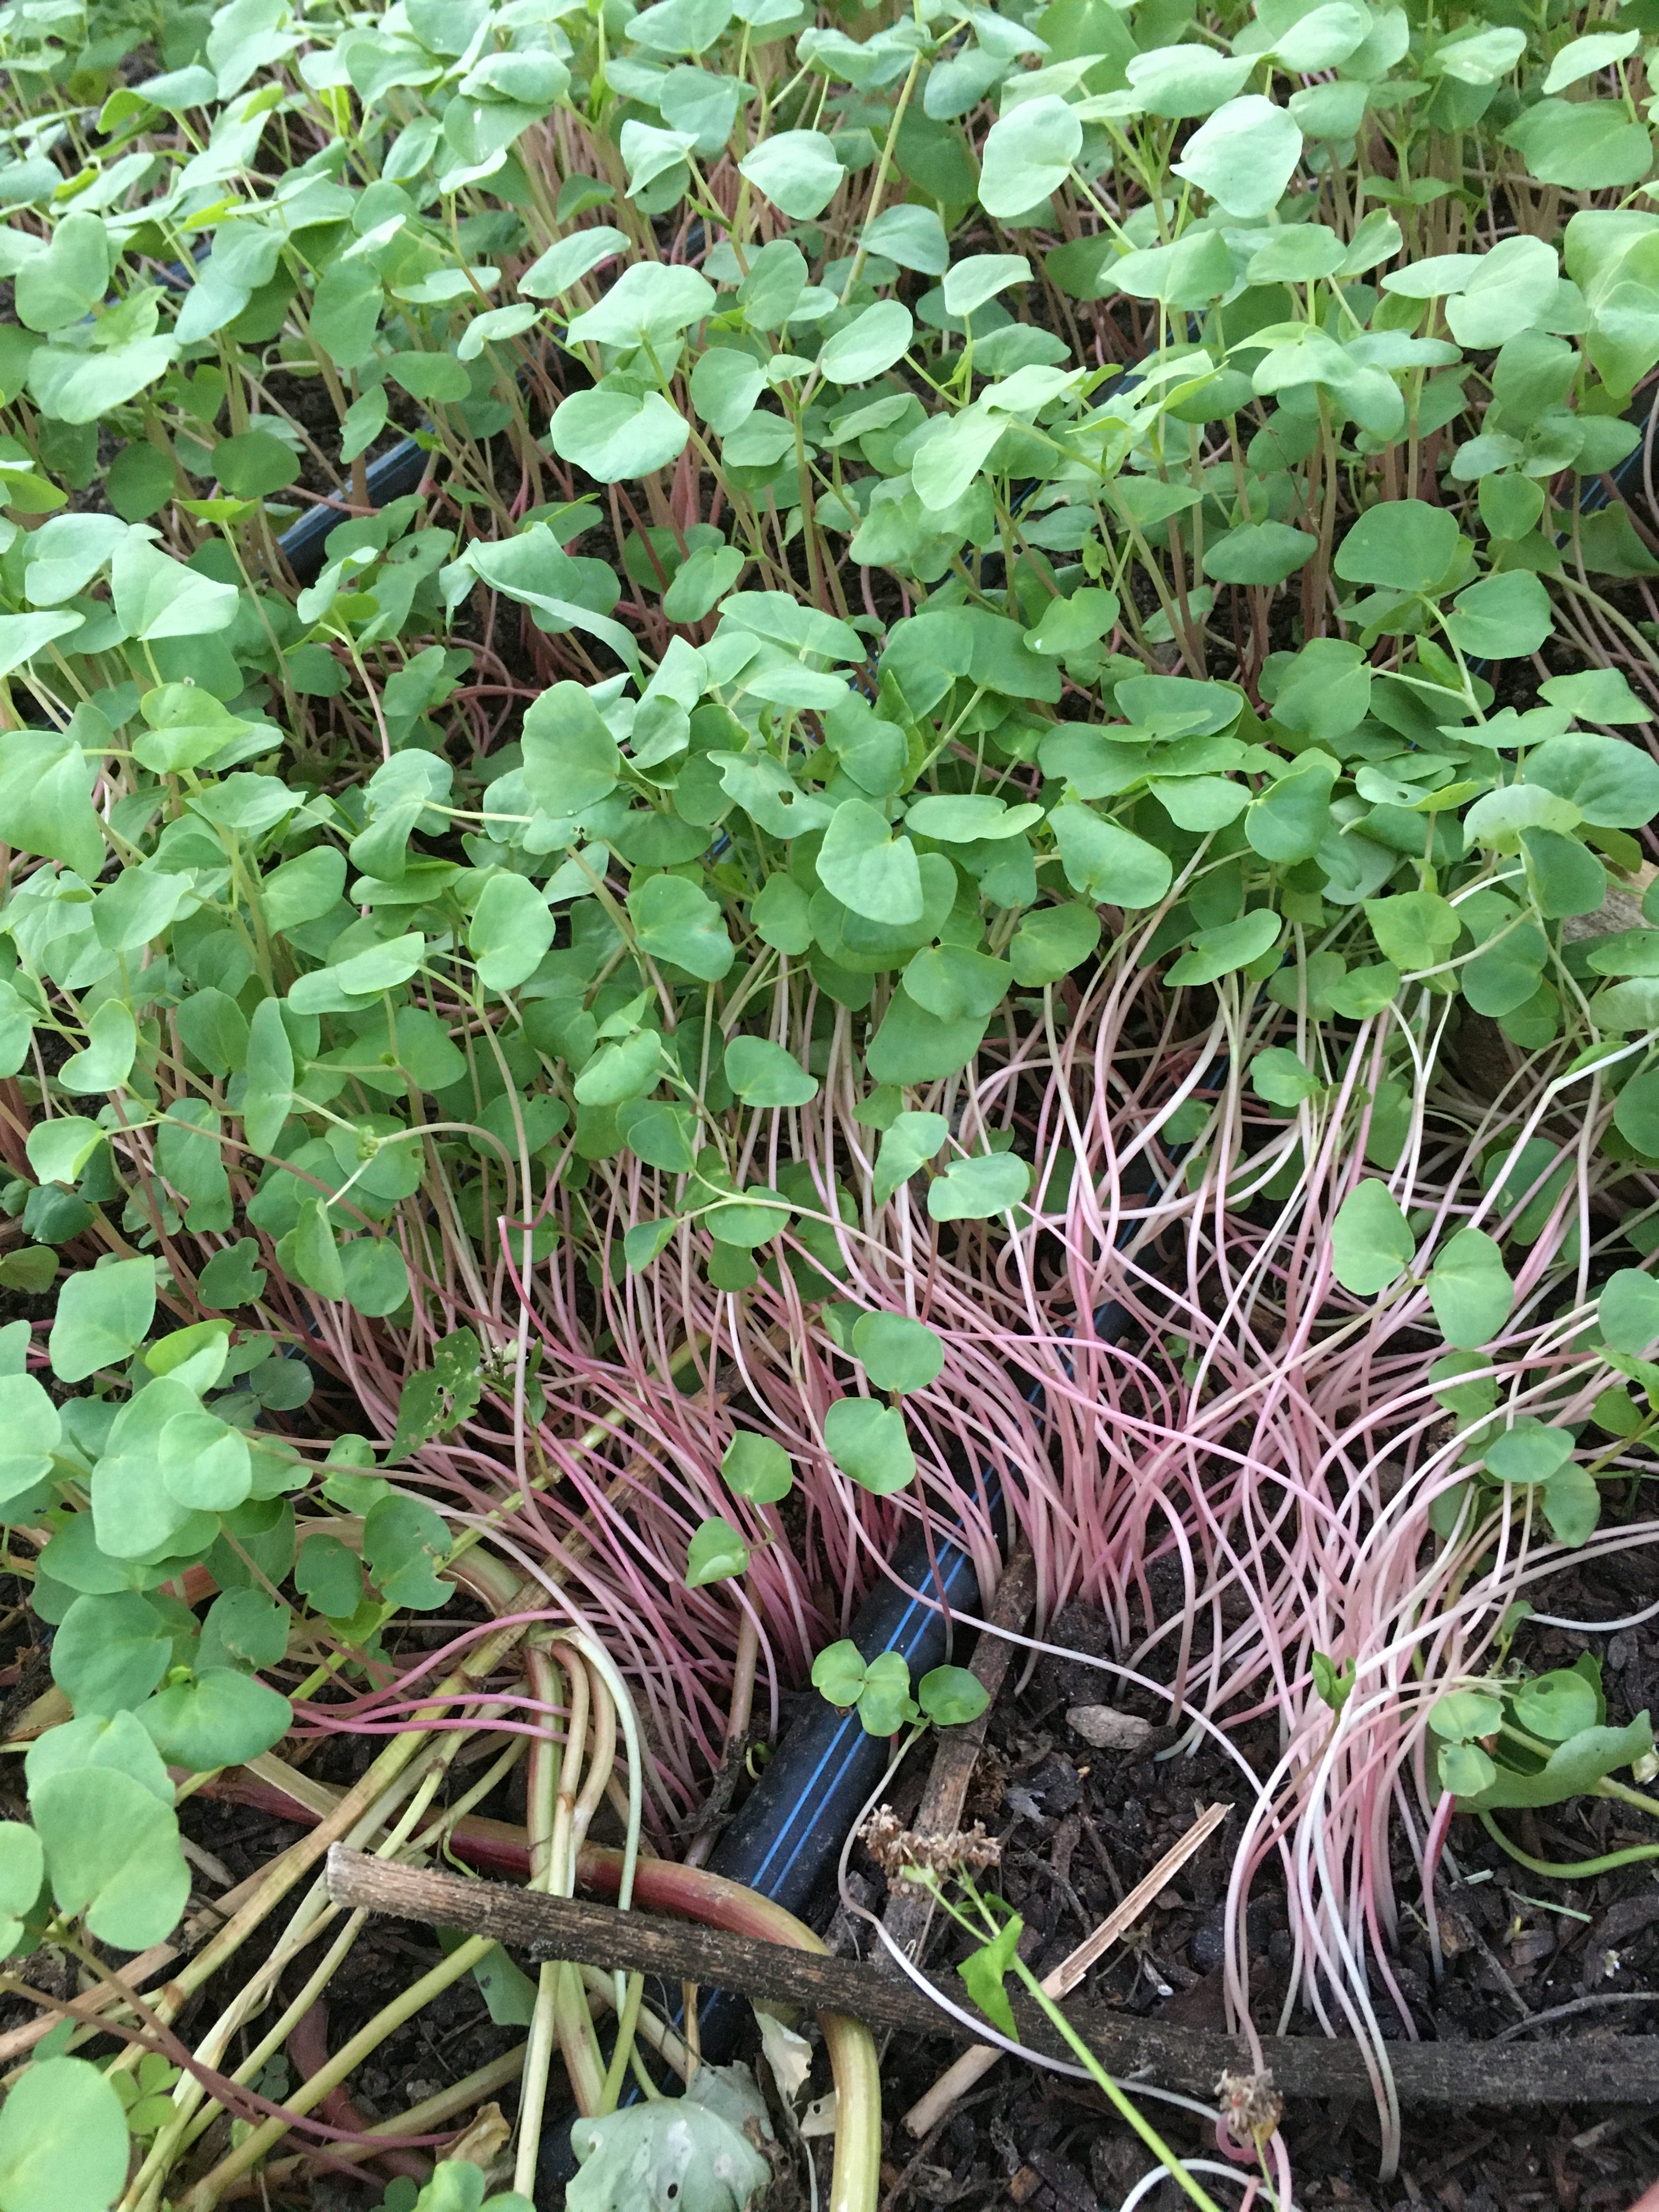
Buckwheat is a fantastic cover crop for so many reasons. It germinates easily from broadcasting (versus some cover crops need a seeding implement such as a drill seeder). It is cheap. It grows very rapidly so it outcompetes any weeds. Its rapid growth (a full stand will grow in just over 30 days during the heat of summer!) also means it can be planted when there is not much of a window for a cover crop. It thrives in our hot summers here. It is a tremendously beneficial plant for pollinators who are attracted to the multitude of little white buckwheat flowers. Because it is so tender and succulent, it’s very easy to terminate with just a push mower (excellent for no-till/no-tractor farmers). And it has great root system that loosens the soil as it decays after termination (also great for no-till/no-tractor farmers). All of this added up to buckwheat being the perfect cover crop choice for revitalizing hoop house soils during the summer months.
If I were trying to do this process during cooler months, I would have used a mustard and daikon mix. The added benefit of those two would be that they have biofumigant properties that would help with suppressing disease build up. If disease becomes an issue again in my hoop house, I will cover cropped it during some cooler months to get at least one round of mustard in there. But since revitalizing my hoop house soils during the 2019 summer, the disease issues seem to be a lot better.
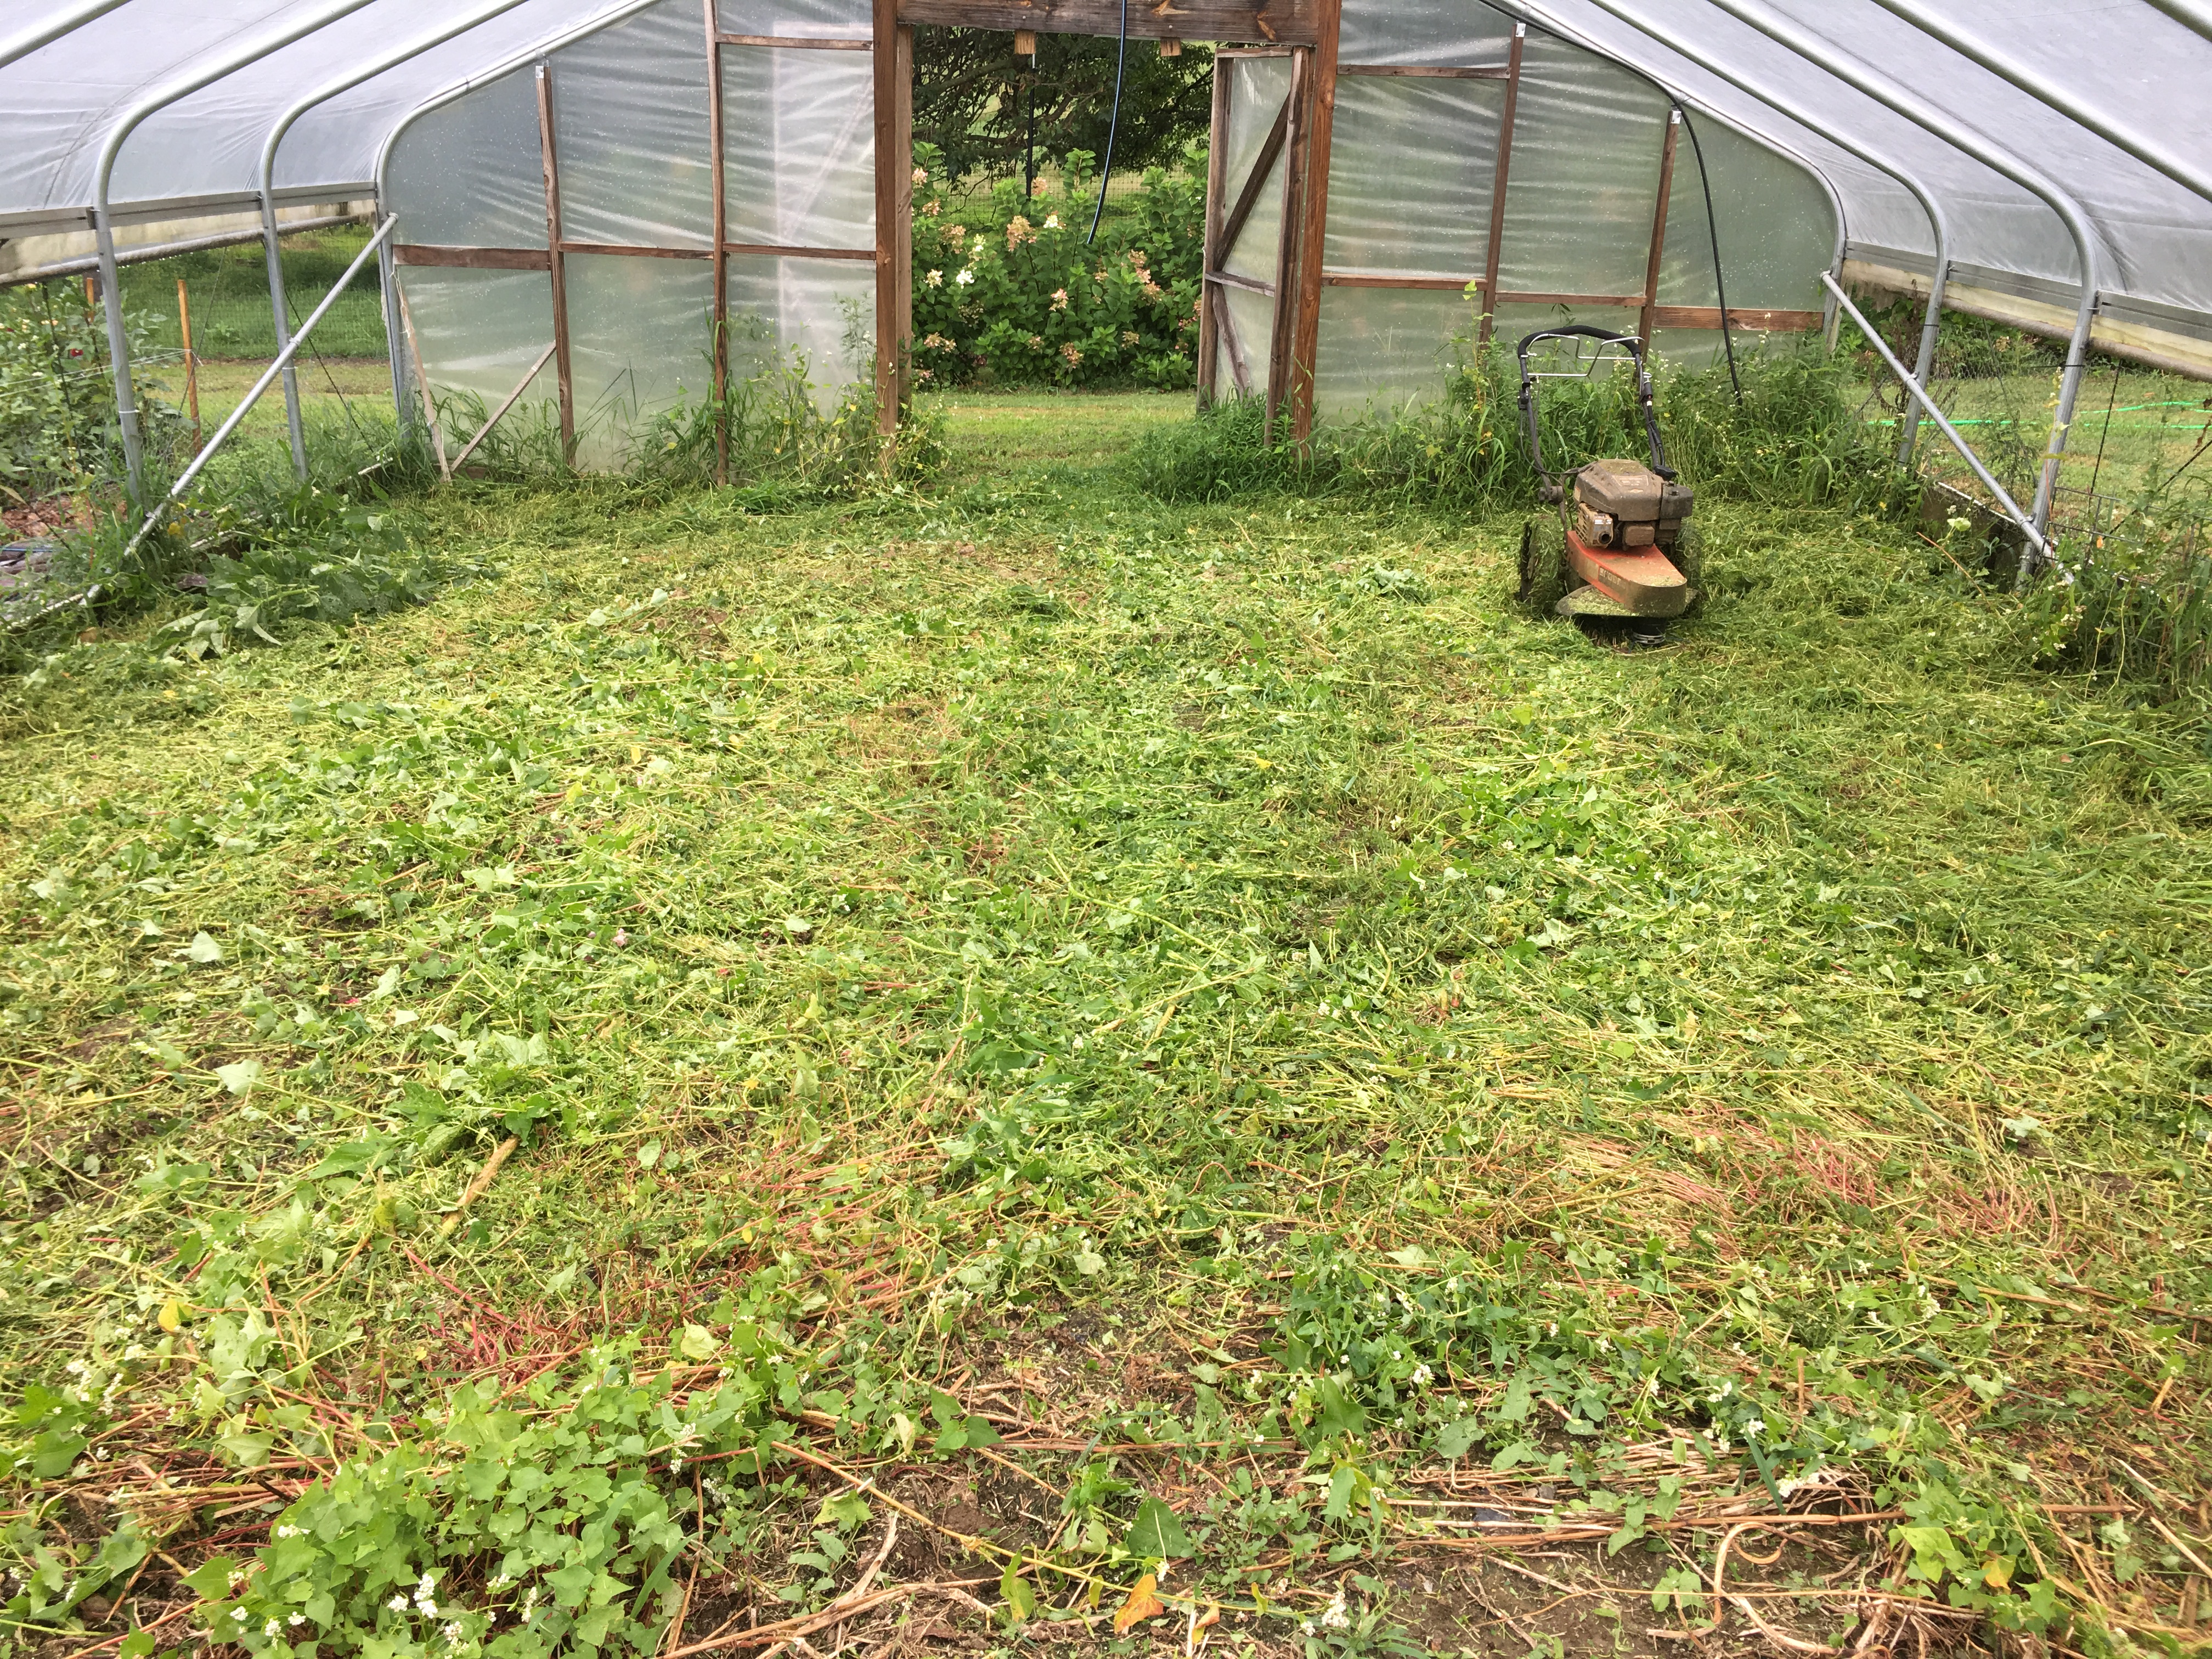
After Round 1 of buckwheat had gone to flower, but prior to it setting seed, I used my walk-behind string trimmer to chop the buckwheat down at the base. I broadcast another round of buckwheat seed throughout the house and then gave it a good soaking with the hose. Within a few days, Round 2 of buckwheat was germinated and pushing through the old buckwheat debris. At this point it was late June.
Round 3 of buckwheat was sown in late July after Round 2 was terminated. Same process as described above. Round 3 of buckwheat was then terminated in early September.
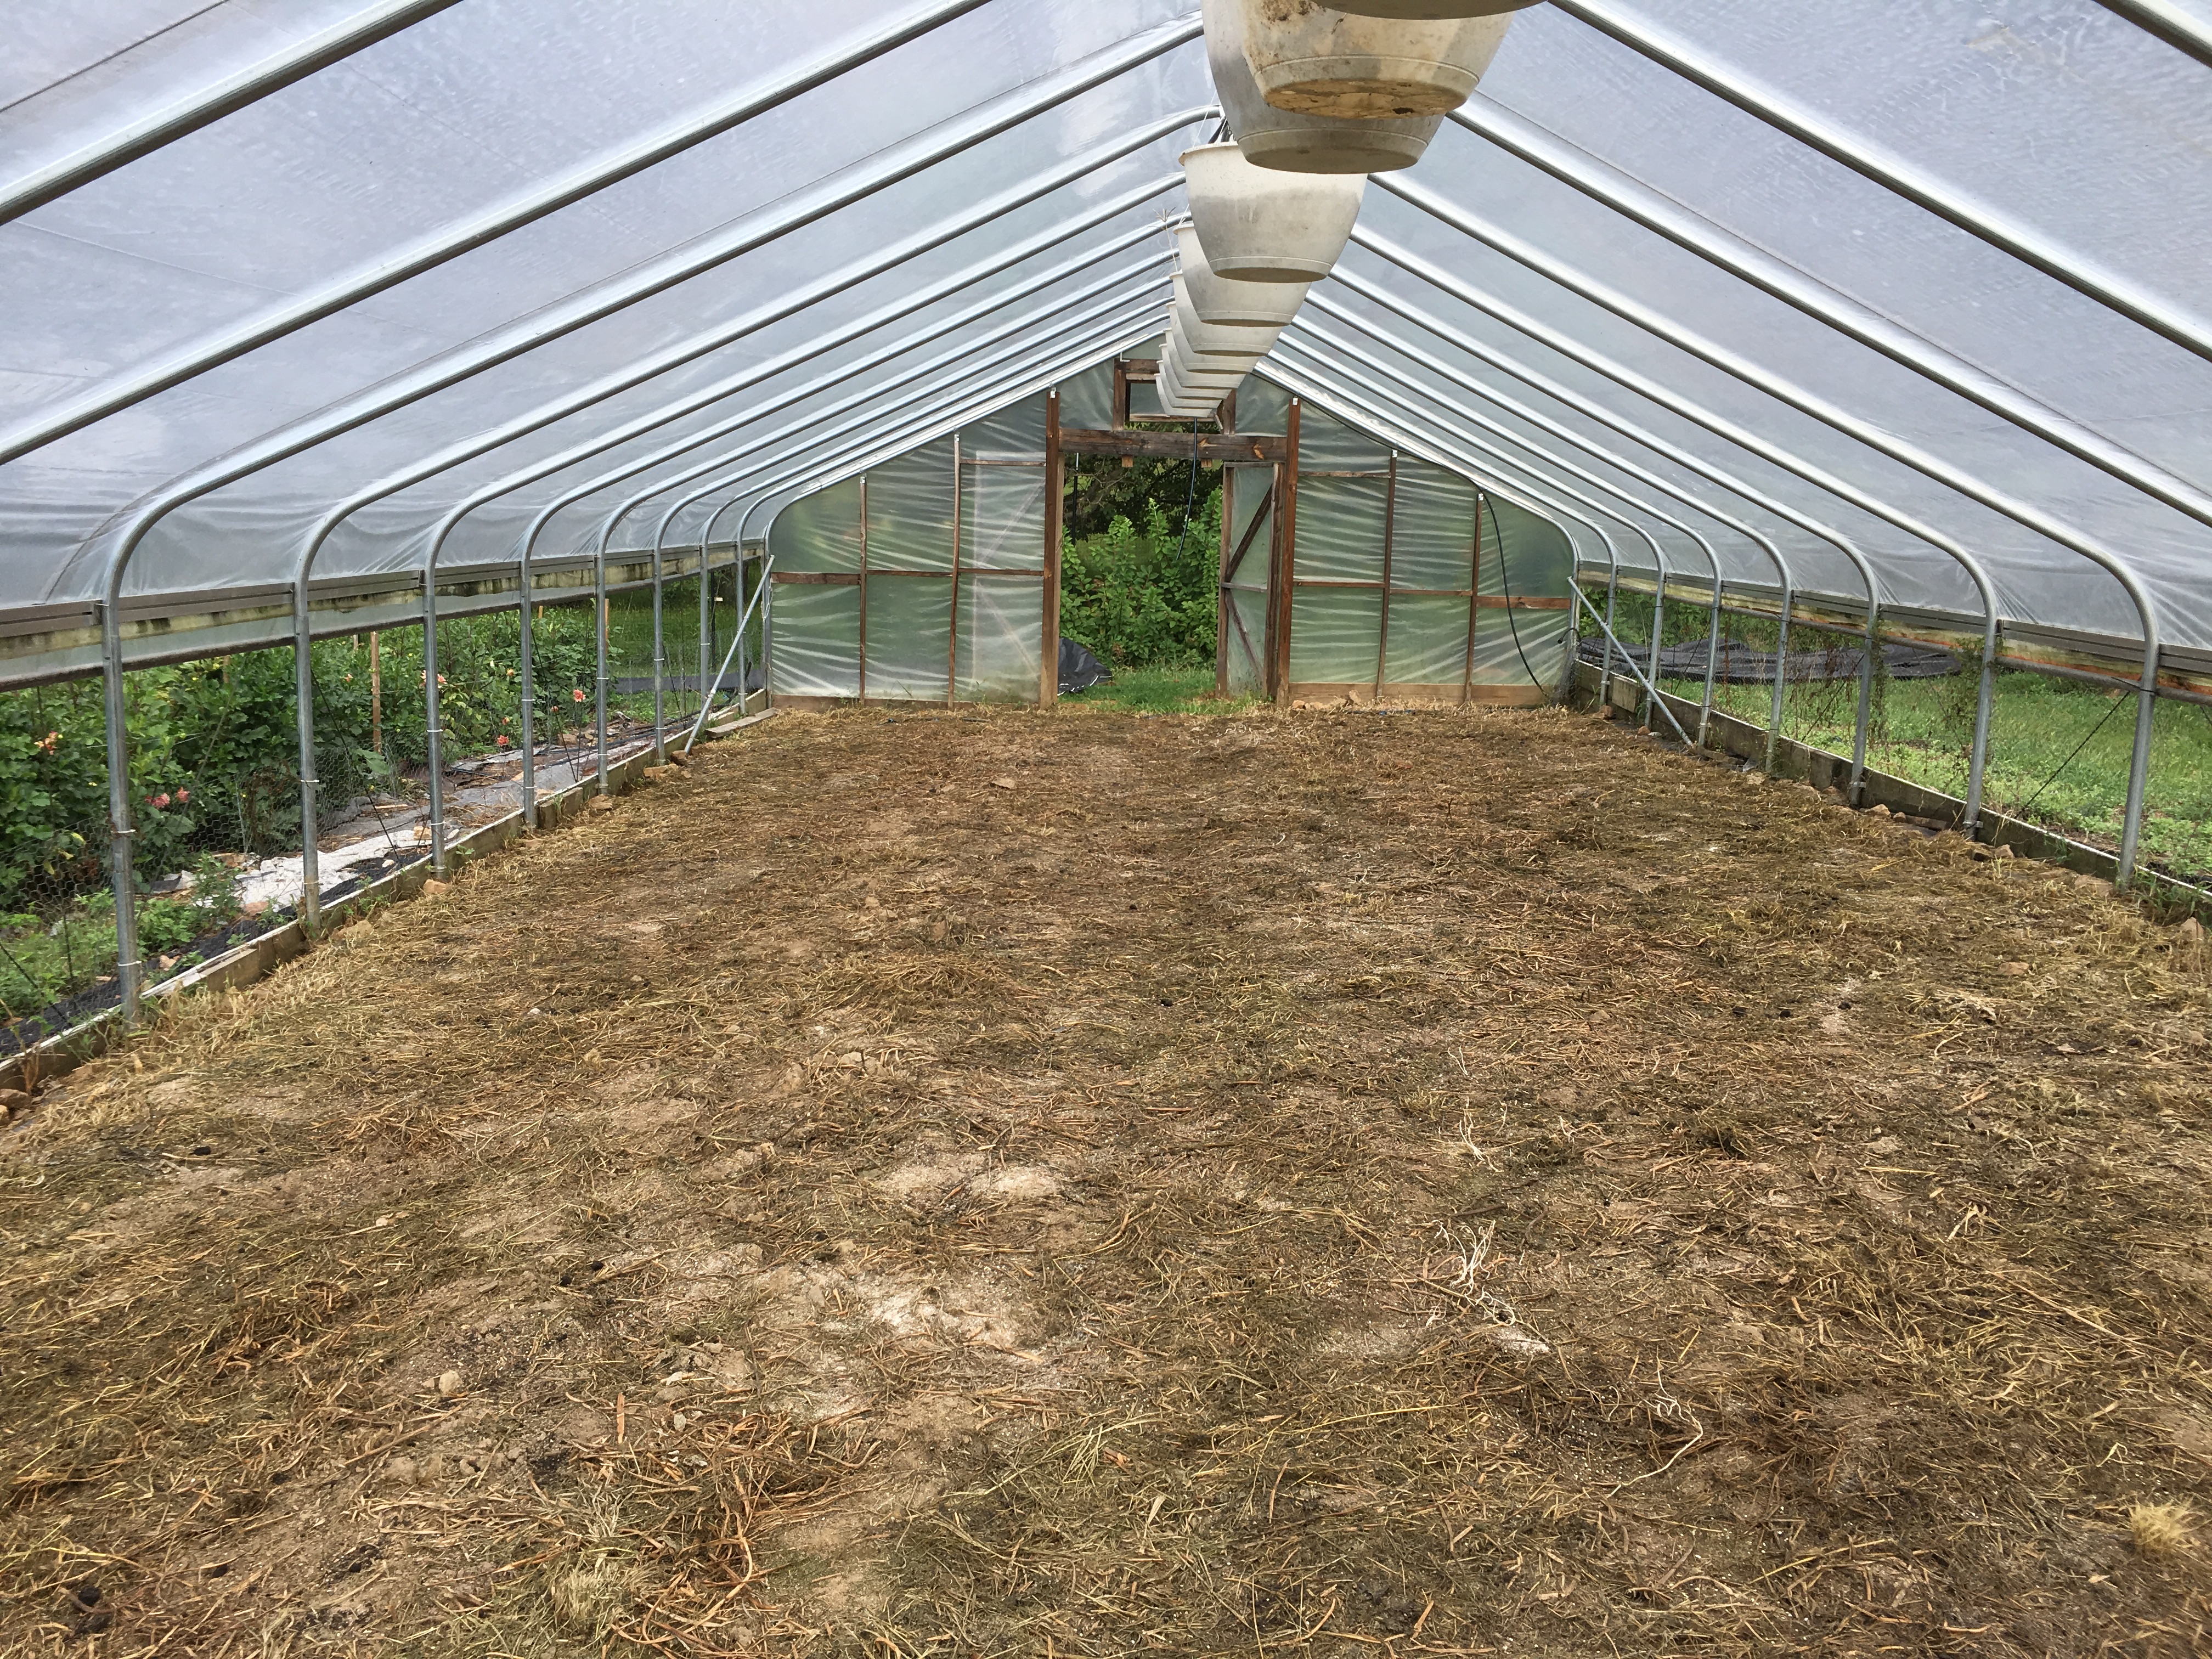
After chopping down Round 3 of buckwheat, it was time to move forward in the process. The buckwheat had helped to fight weeds in the house all summer. The three rounds of finely-networked buckwheat root systems had created substantial biomass in the soil that was now breaking down rapidly to feed the microbiology that was (hopefully) multiplying in the soil now that The Rule of Return (more on this later) had been followed. The buckwheat also mined a lot of minerals during its trio of growth cycles that were also being put back into the soil ecosystem.
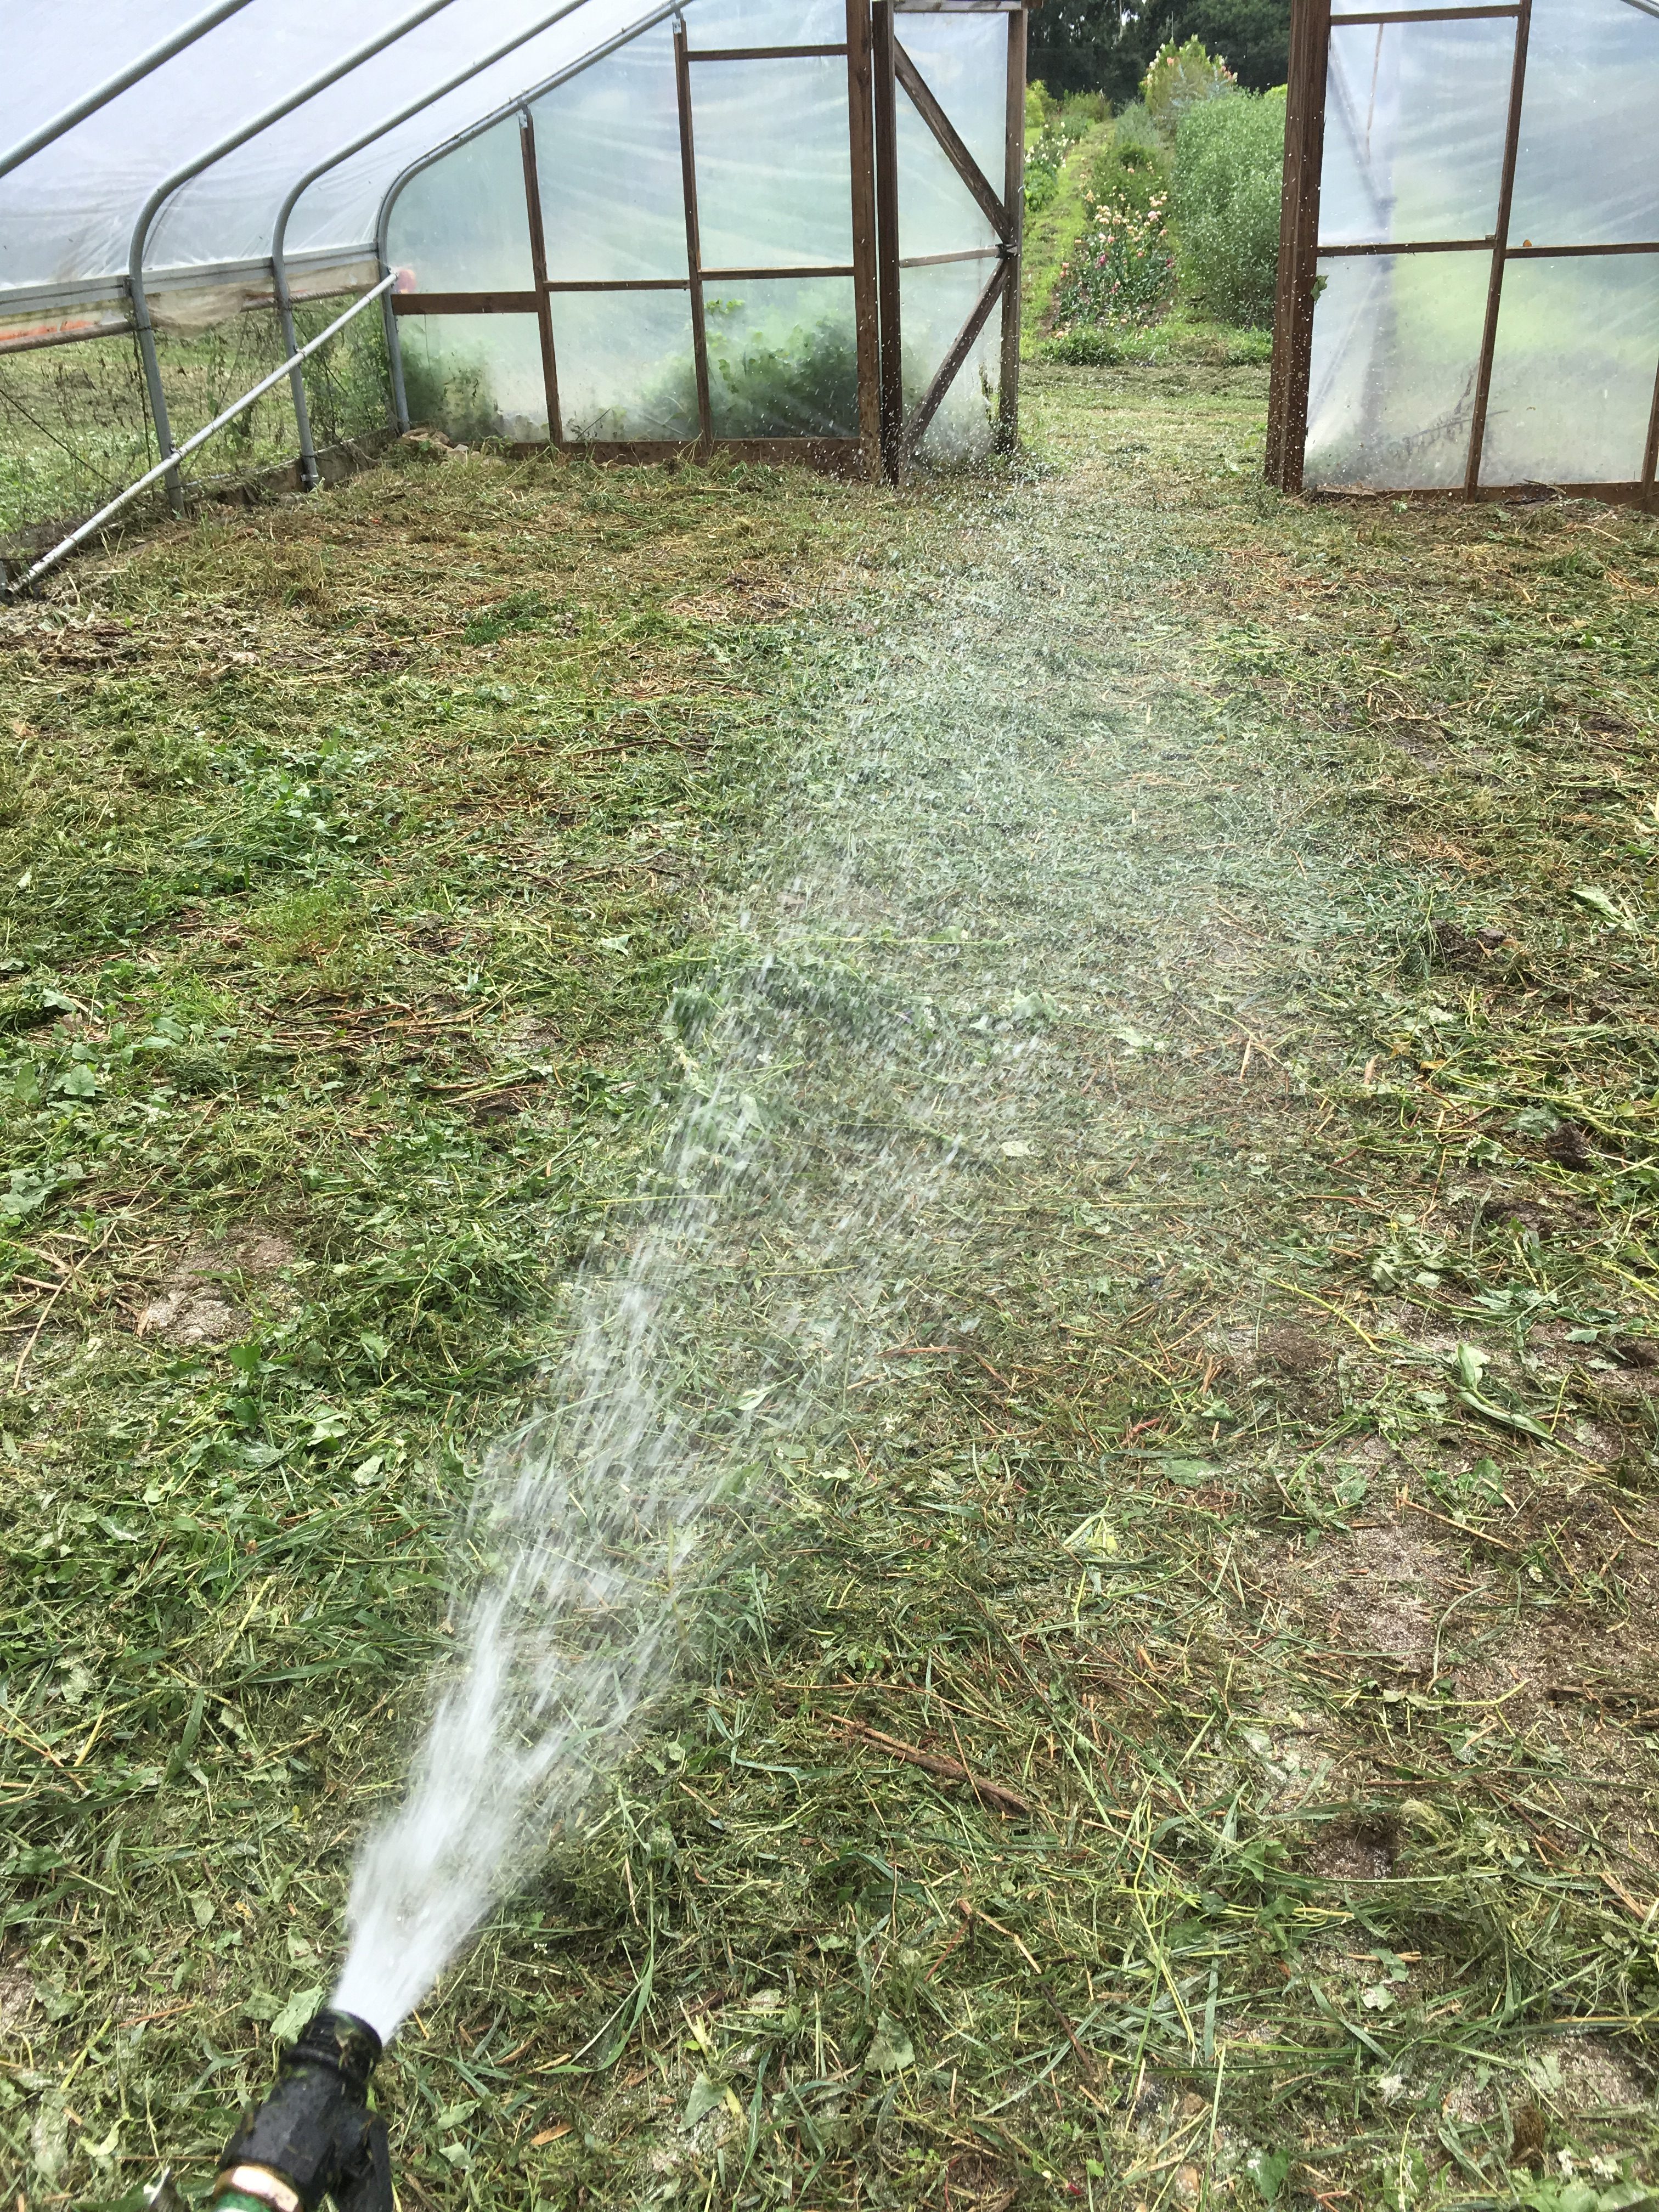
The next step was to get all that plant debris from “the summer of buckwheat” to break down without having to till it into the soil. After using a hose to wet down ground for about 15 minutes, we pulled tarps across the entire interior of the hoop house, all the way to the edges. This tarping over moist soil in the warm hoop house created a highly digestive state under the tarps, which churned up all the remaining plant material from the buckwheat in just three short weeks! It also killed any weeds that might have managed to thread their way through the summer of buckwheat.
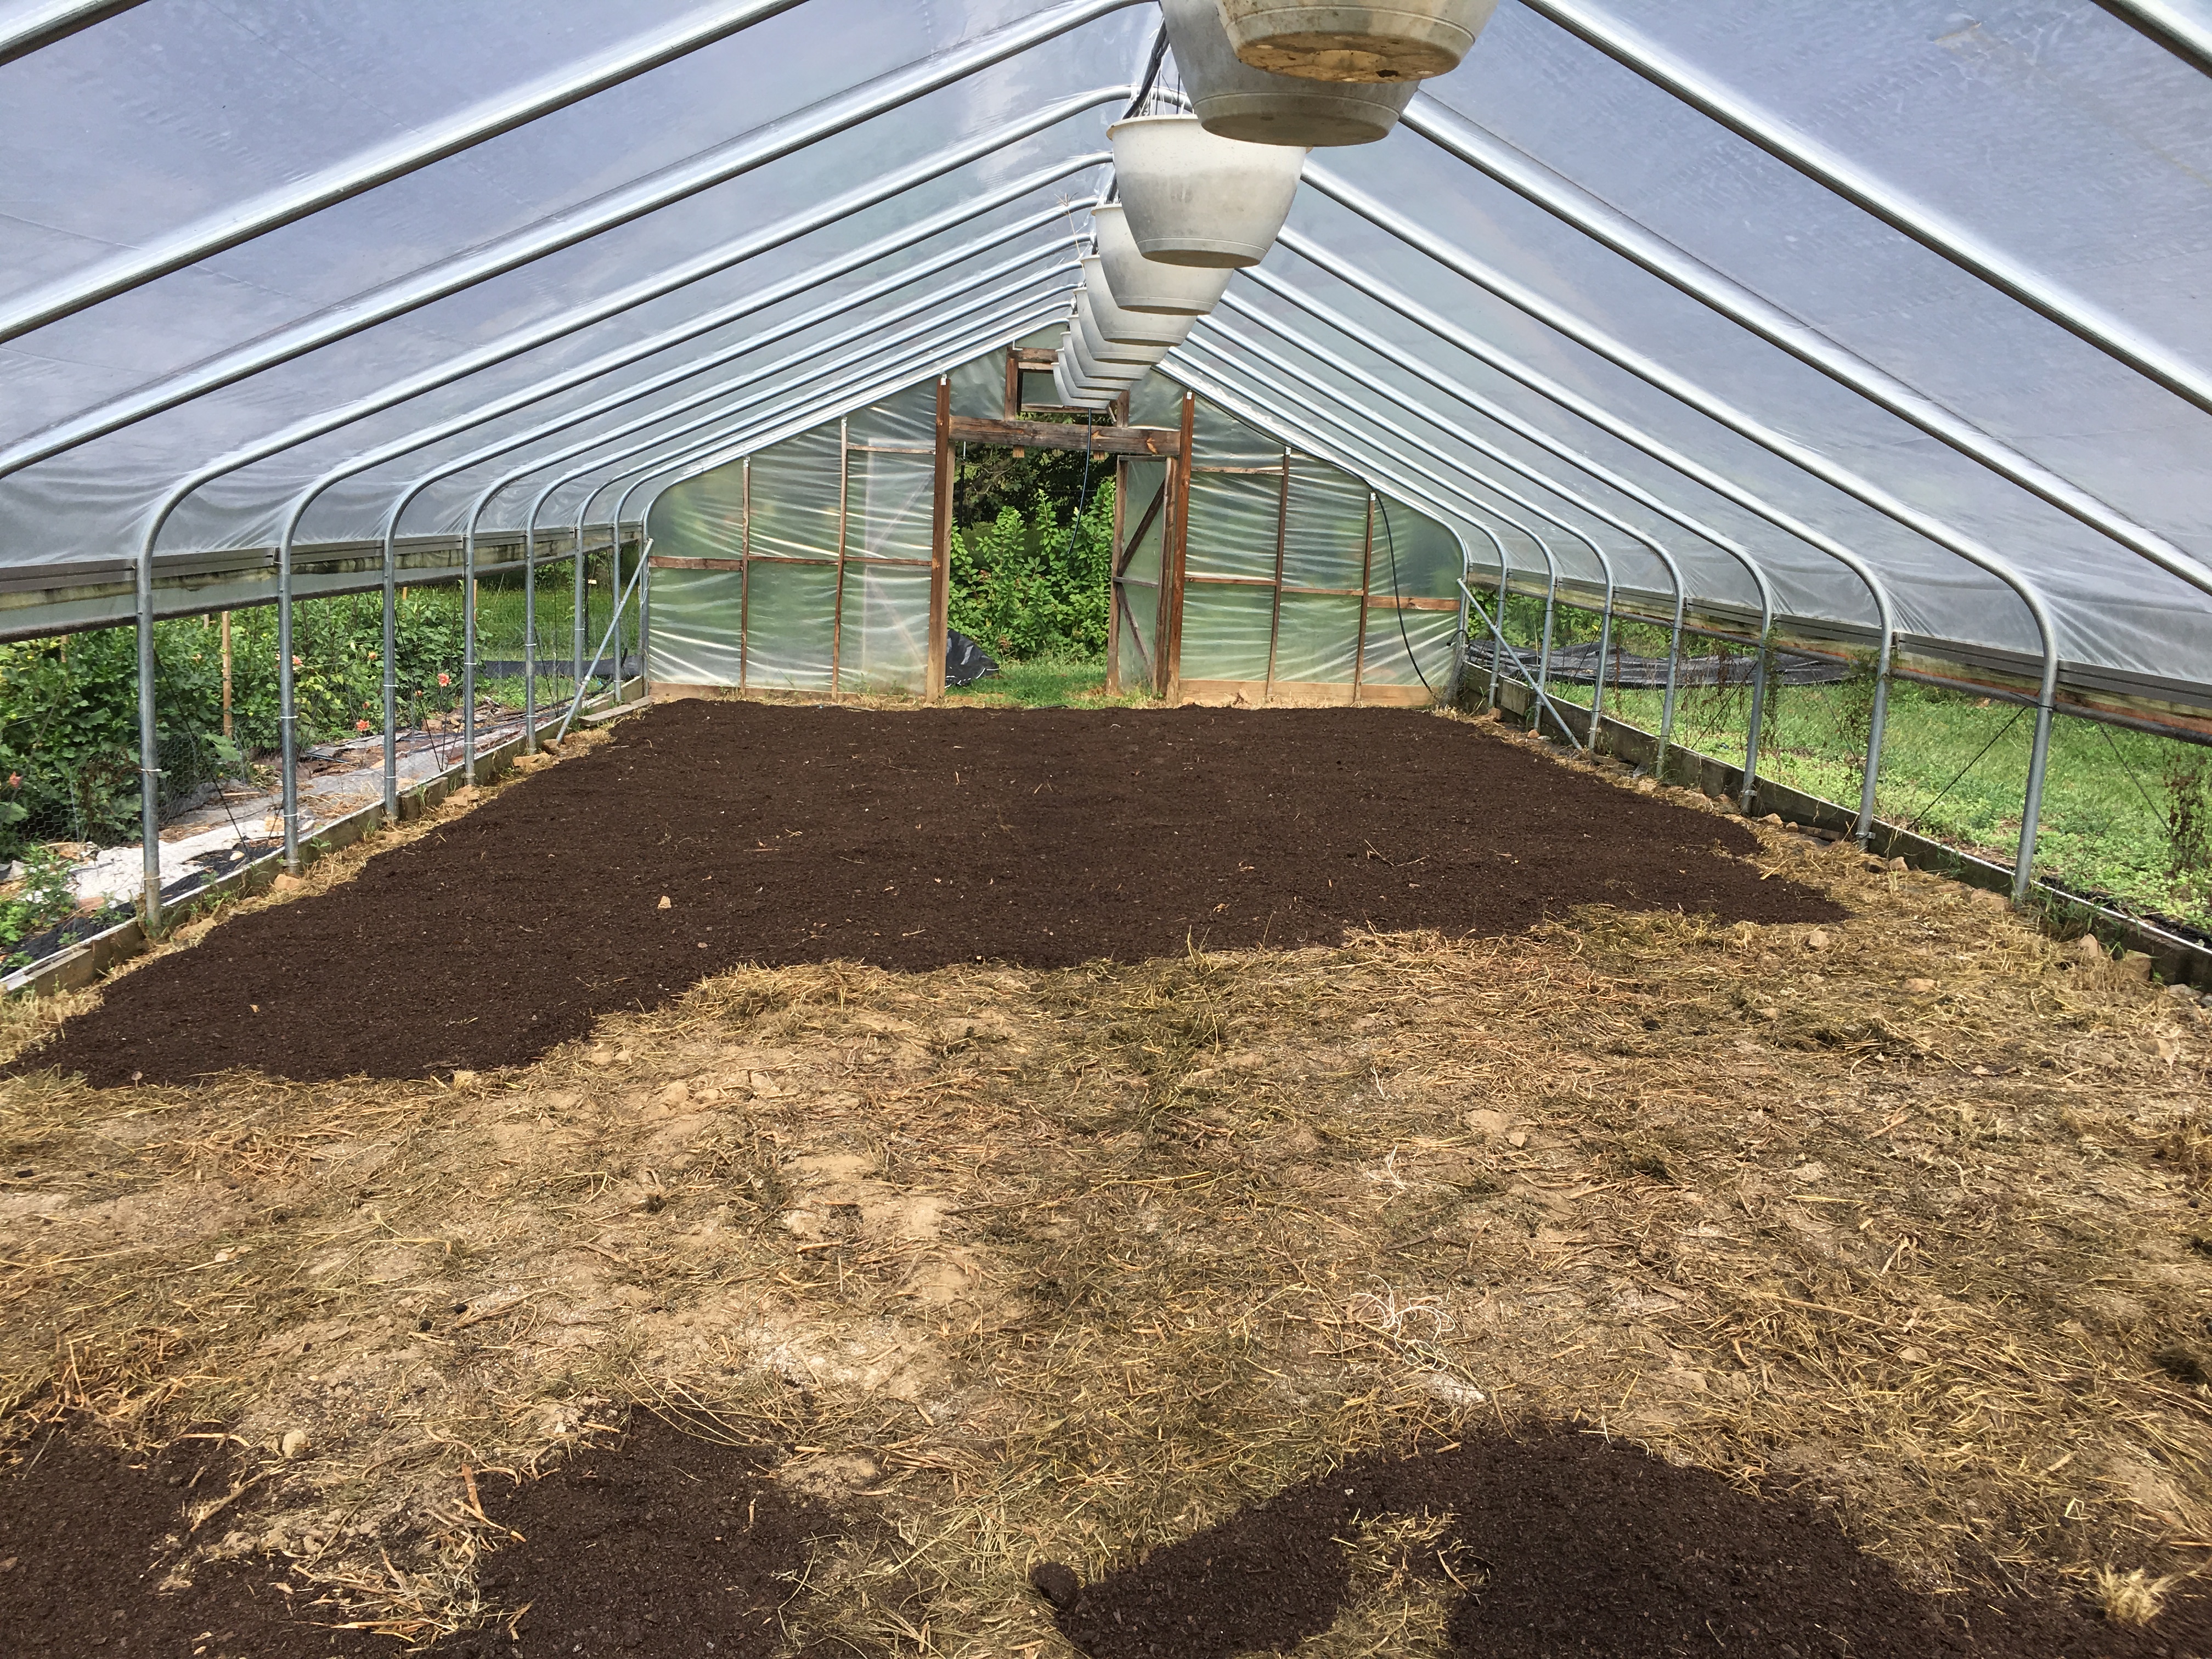
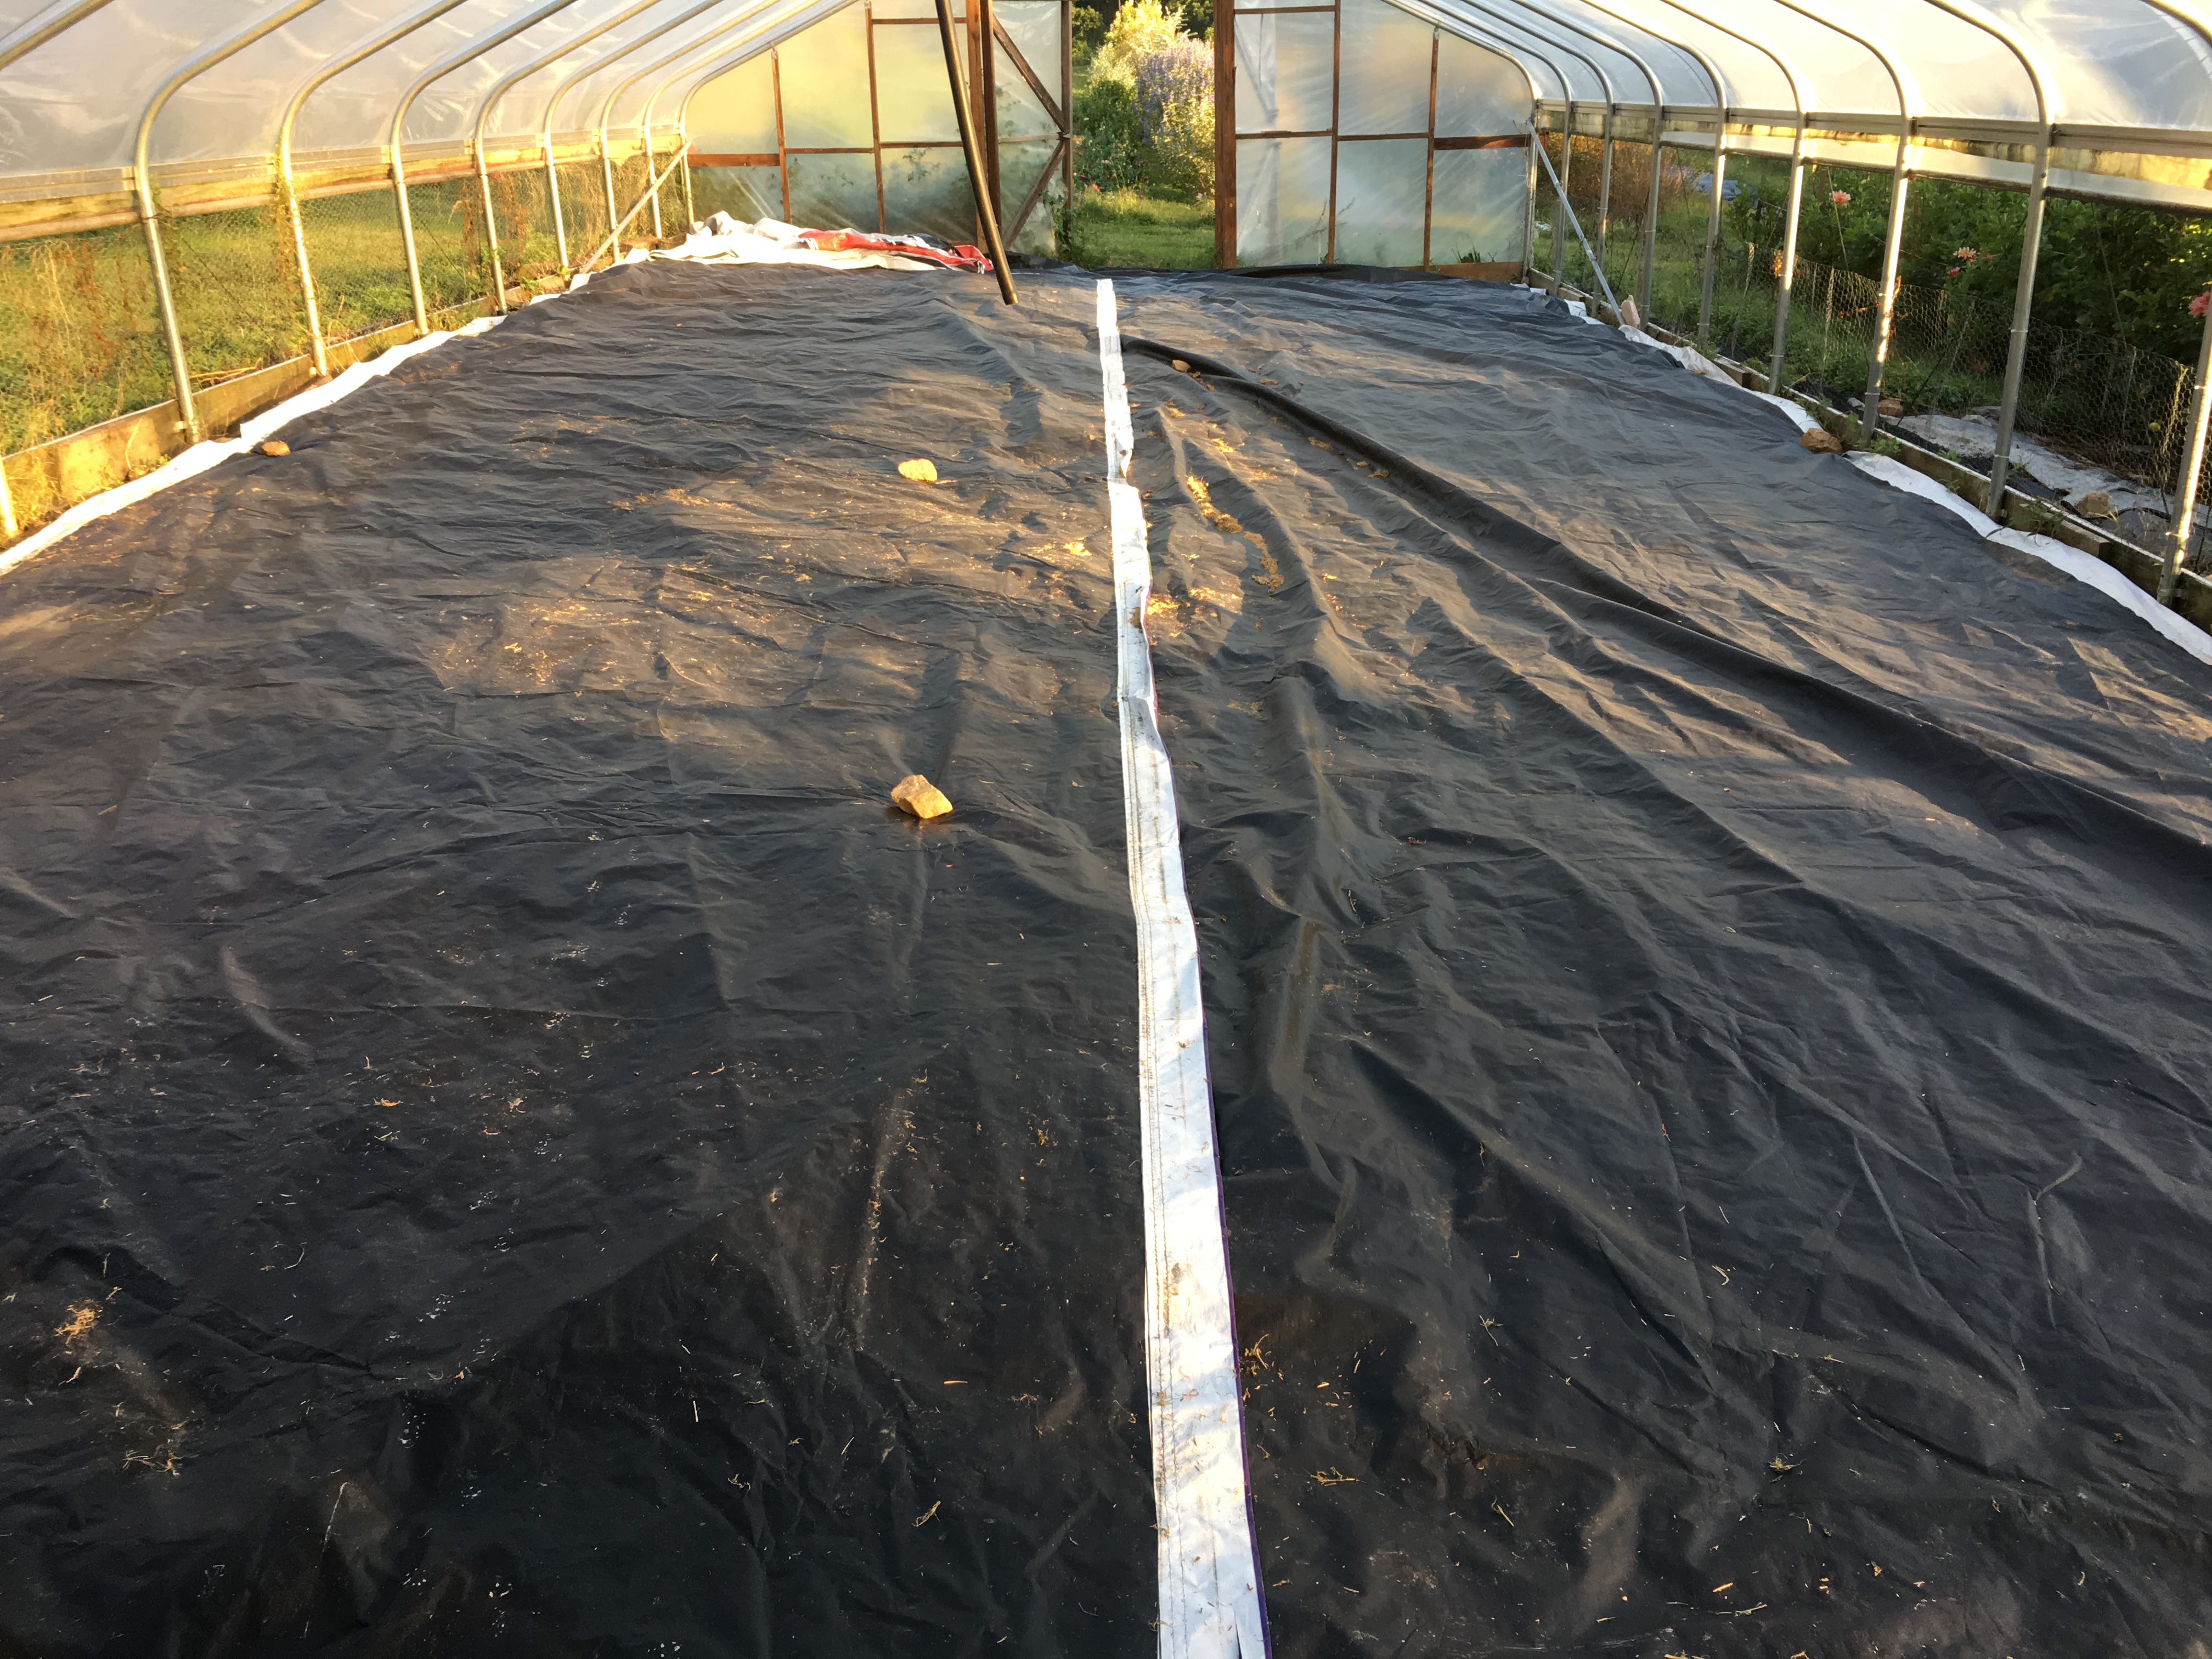
At this point, it is late September. Next up was compost and amendments. We removed the tarps and broadcast an assortment of soil amendments that were chosen based on soil testing results. Included in these amendments were agaronite, humates, worm castings, sulfur, and soil mineralizer. Your soil will likely need something different than mine so be sure to get a detailed soil test. I recommend Waypoint Analytical for that. After the amendments were broadcast on the soil surface, we brought in some high-quality, well-aged compost. A thick layer of compost (about four inches) was spread across the entire hoop house. We used wheelbarrows rather than a tractor as I did not want to compact the soil after working so hard to revitalize it!
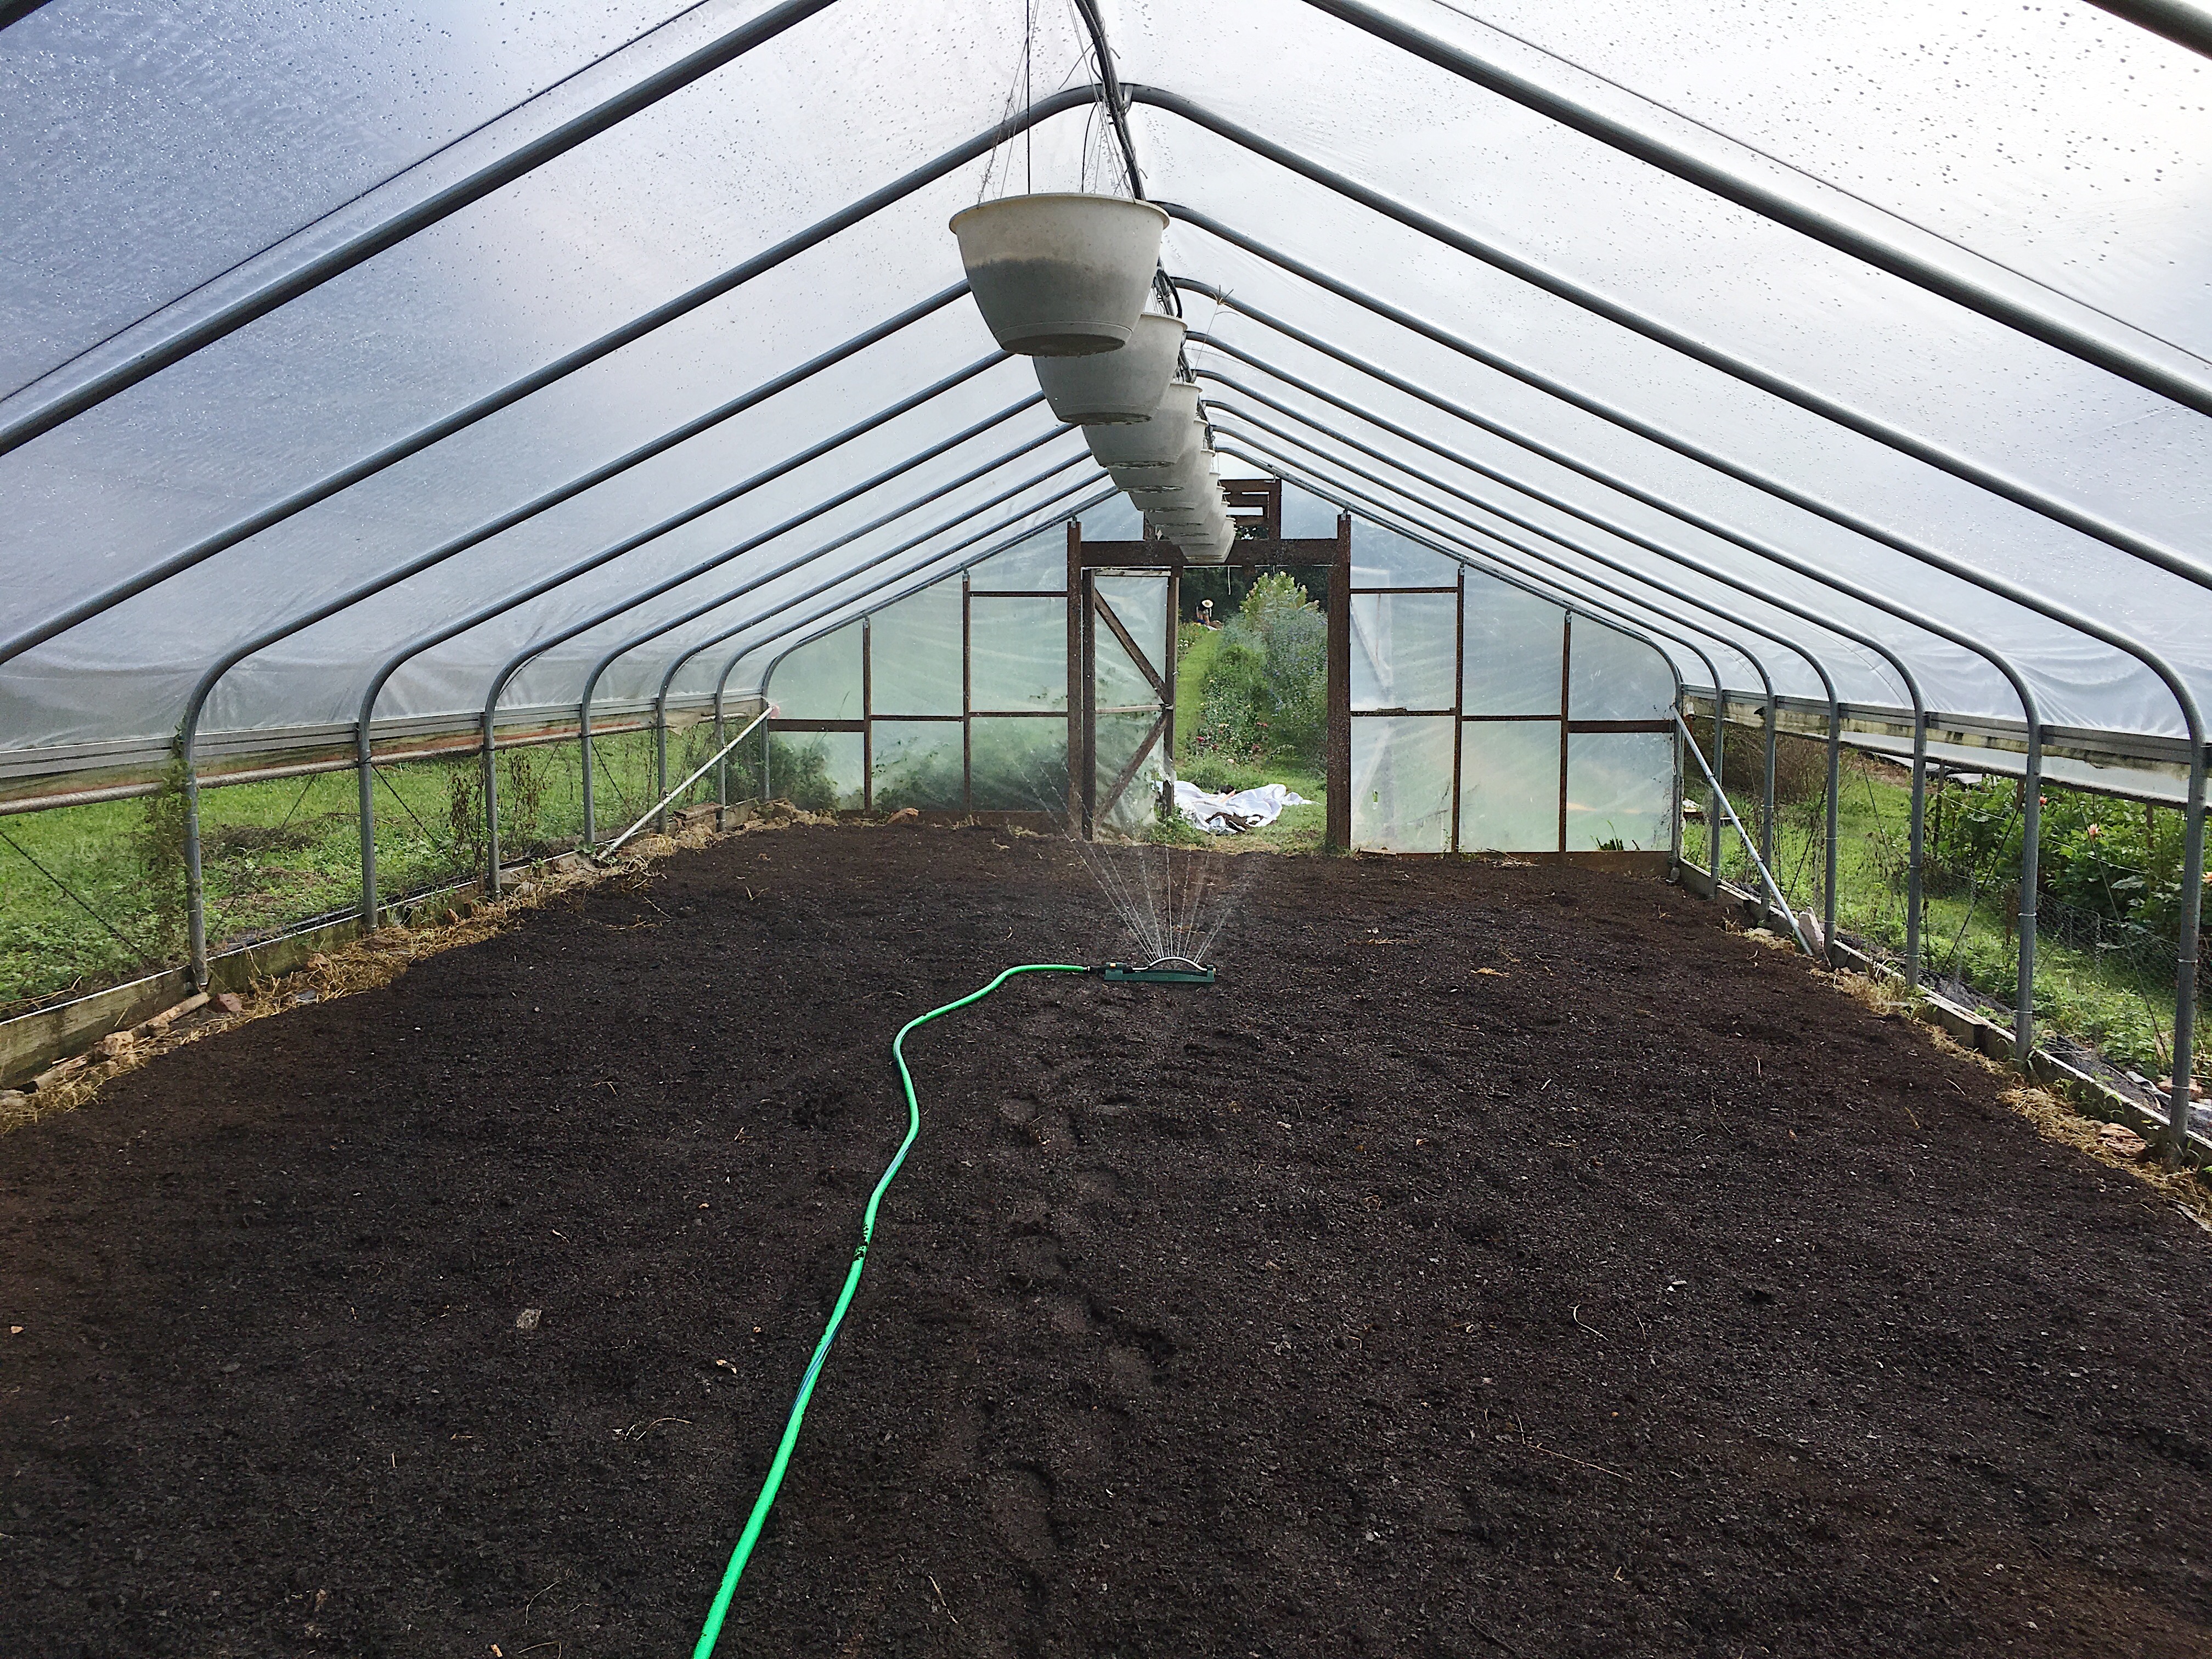
The next step is optional: Because the environment in a hoop house can be quite arid (no rain), high salinity is a potential challenge if growing intensively in a hoop house over several seasons, especially if the farm is using synthetic fertilizers or mushroom compost (notorious for high salts). My farm has never used synthetic fertilizers or mushroom compost so the salinity level in the soil here was really pretty good (.43). But since I know it is recommended to remove the skin from a house every so often to let the rain in, I figured now was a good time to simulate a heavy rain event by running a sprinkler in the house for 48 hours straight. If you have a soil salinity reading of more than 1.25 (using a 1:2 testing model), you’ll want to be sure to incorporate this step during the process of revitalizing your hoop house soils.
After letting the house dry out for about a week after running the sprinkler, it was time to layout the beds and get ready to plant. Having learned from my mistakes over the years, we were very diligent this time about measuring out the beds precisely and marking them with permanent short corner stakes pounded securely into the ground and tomato twine run on the ground around the boundary of each bed. This has been superbly helpful in making sure we are not stepping into beds and whenever adding amendments now we know precisely where to put them. Wish I had been this careful the first time I laid out this house!!
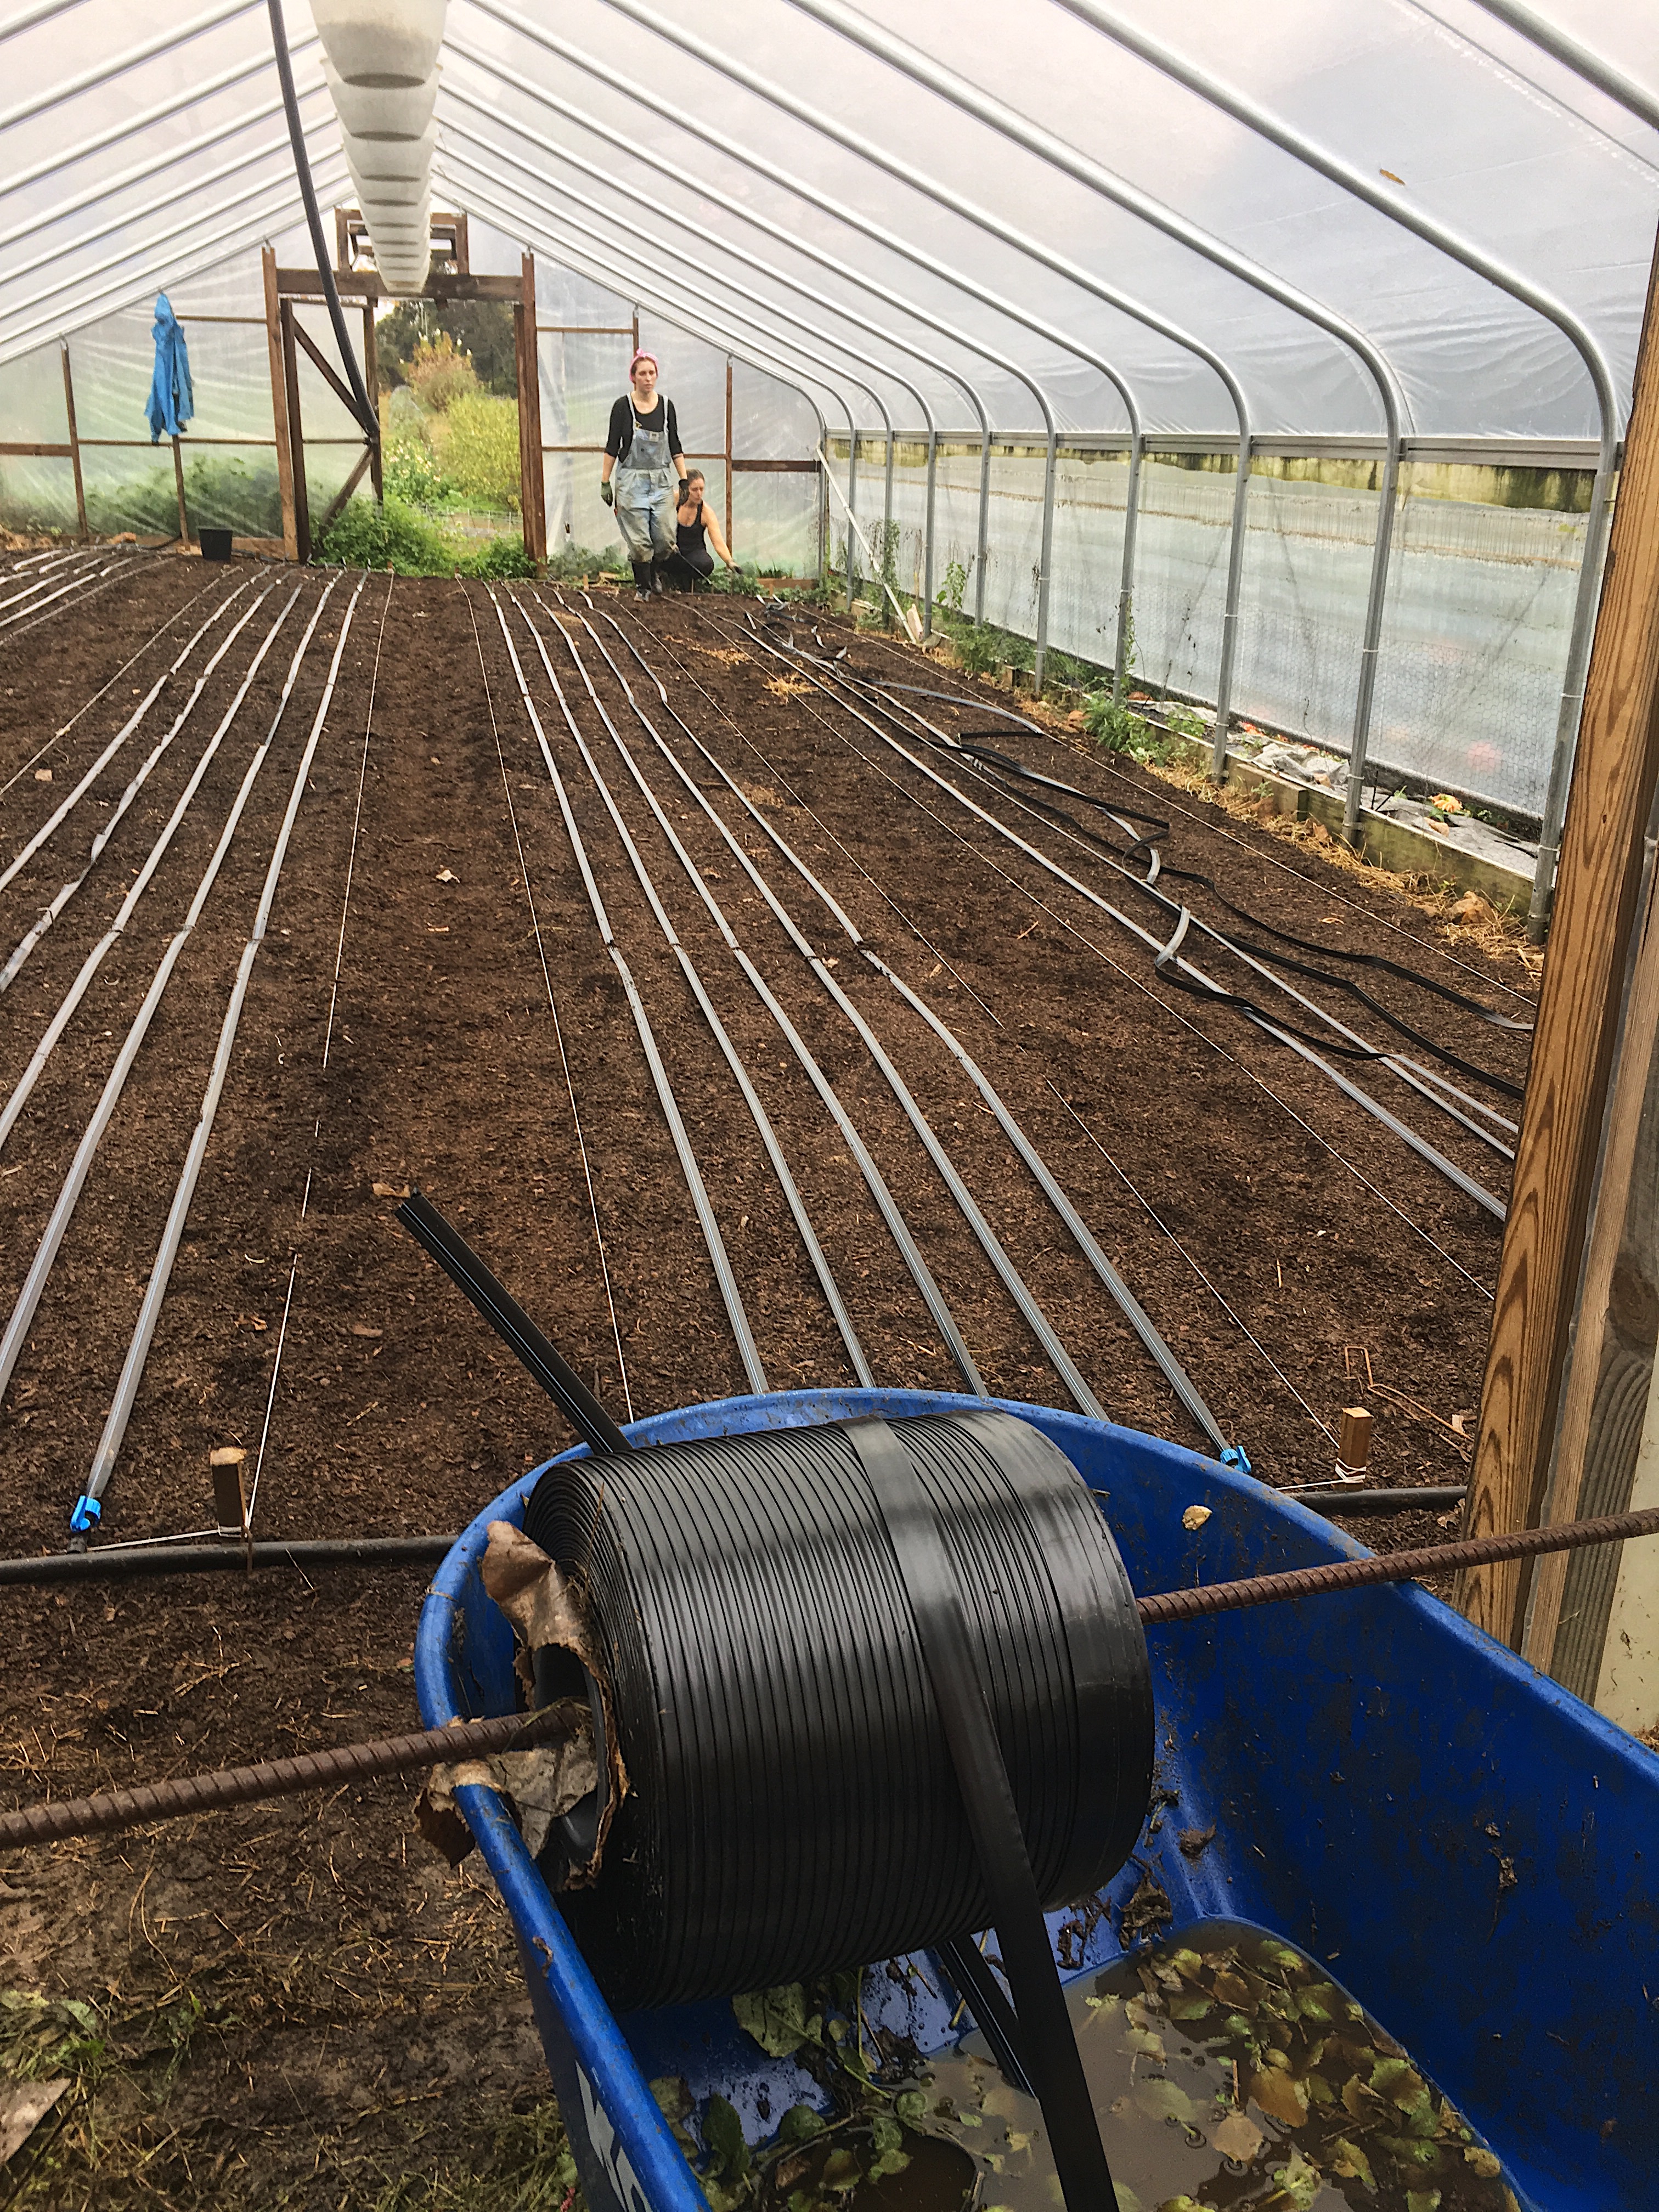
With the beds clearly defined, prior to laying drip tape, we broad-forked the beds once more. Then we laid the drip tape: five lines per 36” bed (six inches between the lines). The drip tape doubles as a planting guide so we know planting is straight within the rows. The third week of October we planted flowers once again (ranunculus, campanula, snapdragons, etc) to grow through the winter and bloom in the spring. After the beds were planted and the transplants were growing nicely, in December I spread a thin later of mulched leaves on all the beds for a little extra microbial boost. I also thickly mulched all the walkways with leaves so no weeds will come through.
So there you have it! A process for revitalizing hoop house soils. And it really worked here! The soil in this house, previously pulverized, compacted and uninspiring, has been fluffy and full of life ever since! Where there was a hard pan just a few inches down and planting was a real chore, now it’s easy to sink a probe 12” or more into the soil! The crops are healthy and the pest pressure has gone way down, though some credit should likely be given to having adopted Korean Natural Farming (KNF) practices too. Another topic for another info-packed blog post in the future! In the meantime, be sure to listen to the No-Till Flowers Podcast if you haven’t already, particularly the episode with Tony from Bare Mountain Farm for more info on KNF.
If you’d like to learn more about flower farming and regenerating soils, check out this past blog post and this past blog post.
All photos in this post are property of Love ‘n Fresh Flowers. Do not use without written permission.
Revitalizing Hoop House Soils
Revitalizing Hoop House Soils
Revitalizing Hoop House Soils
Revitalizing Hoop House Soils
Revitalizing Hoop House Soils
I love everything about this post! Thanks so much for sharing your revitalization project!
I have one small question regarding the drip tape. I love the idea of using it as a planting guide, but how do you keep it in place? Mine curls and bends and moves all over the place when there’s no water pressure in it. Maybe I’m using a low quality drip tape?
Thanks, Lisa! Great question about the drip tape. If you look really closely in the photo of us working to reestablish the beds, you can see that we put landscape staples (like you would use on landscape fabric) every 8 feet or so to pin the tape to the ground. At the end of the line (opposite the header connection), we also tie off the drip tape to a very securely seated landscape staple and pull the line pretty snug so there’s not much “give” in the line when it’s empty of water. This keep the lines really straight at all times. We do this in our beds out in the field too.
Thank you!
Another post with wonderful content, thank you Jennie! I’ve listened and loved all of the No-Till Flowers podcasts. You and your guests have been a great help to me already. I am really looking forward to amending and helping my soil, the microbes, and the flowers.
Oh Jennie I need your adivce ! I’m getting my first hoop house in April (Indiana, 5b). My soil is crappy, rocky clay. From what I know about no-till if I keep up the practice then I can improve this clay soil over time. So how do I start my beds after the hoop is installed? Do I broadfork it then lay the cardboard over the clay soil and put in the compost as you did? Maybe putting straw in the pathways. I will finish my growing season in Sept/October so then I can put in a cover crop. Your posts are excellent and I trust your instruction. Thank you.
Wow…I love how thoroughly you explained these tasks! Thank you! I’ve been tiptoeing around my high tunnel for three years now and this kind of information is priceless!! Step by step instruction! A+ girl!!
Hi Jennie,
I have a question if you dont mind my asking. Do you recommend a particular lab for soil testing?
Thank you!
Mary Shields
Waypoint Analytical and Midwest are both good labs.