No-Till Tulip Planting
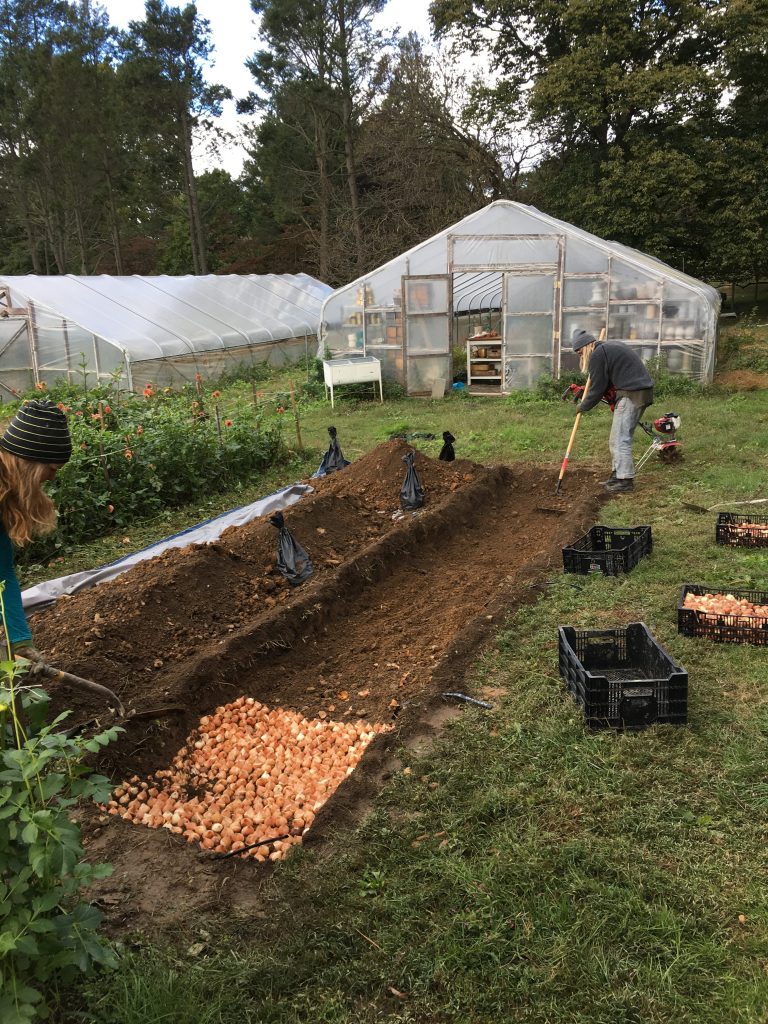
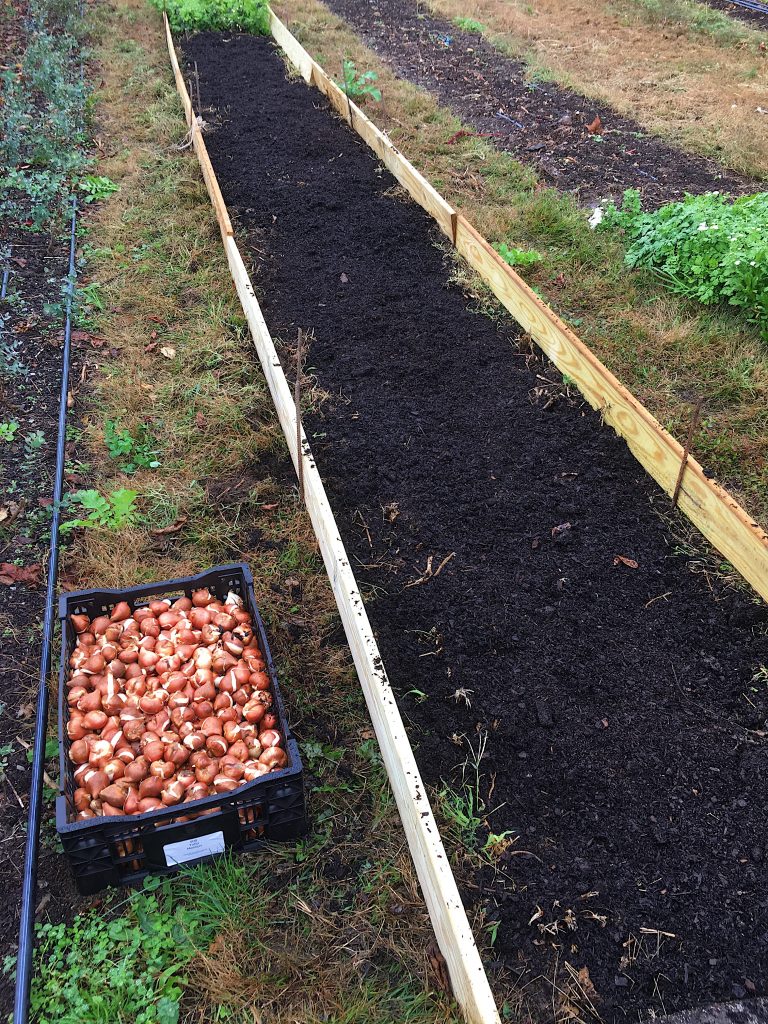
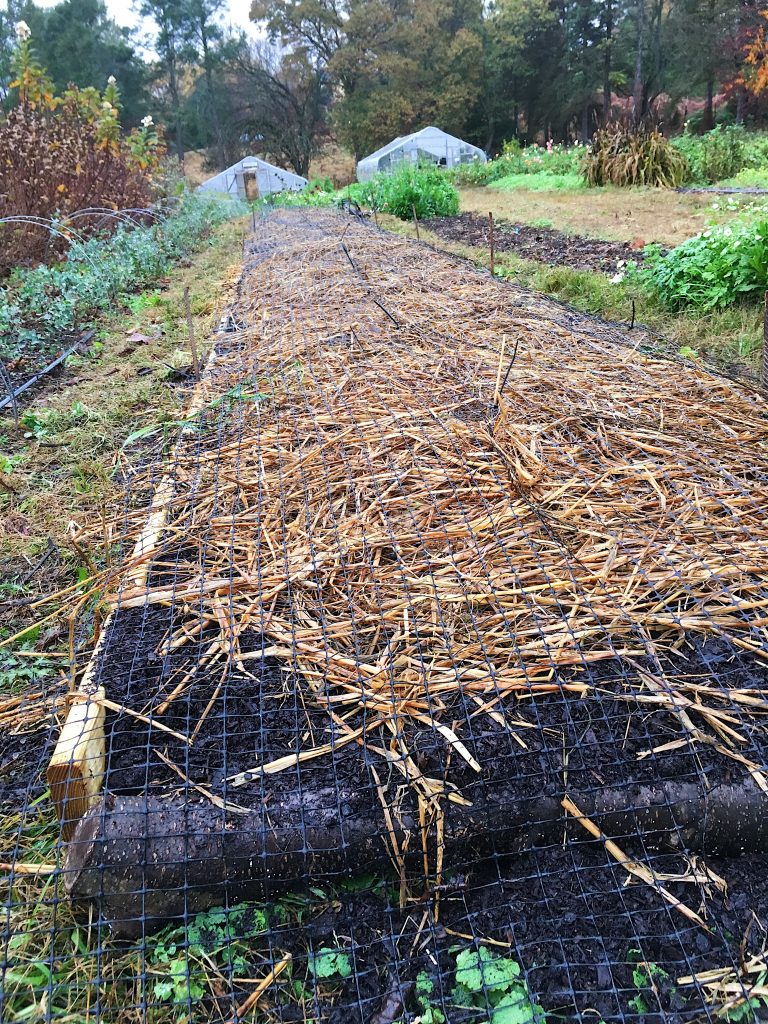
Tulips have been a mainstay crop at my farm since the very first season. I remember learning about planting them for commercial production at the Association of Specialty Cut Flower Growers’ conference I attended that fall. My mind was blown that flower farmers planted thousands of bulbs in big trenches at “egg carton” spacing, rather than digging an individual hole for each bulb, as I had been doing all my life. That traditional planting system is pictured above.
Thus for 11 years, I’ve dug a 6” deep trench into my soil in late October to plant myriad varieties of fancy tulips for spring bouquets. The process involved using either my big 4’ tractor tiller or my little Mantis tiller to loosen up the soil as deep as possible. Then the crew would use shovels to scoop out the soil from the trench and place it on tarps. Once the trench was dug, we would then place the tulips in the trench, scatter in a little compost, then cover up with the original soil and wait for spring to harvest.
As I was preparing for my 2019 growing season, I decided to dedicate my farm to regenerative agricultural practices and adopt no-till strategies for bed prep and maintenance. I’ll be writing many more blog posts about this over the winter, but my first post on the topic is up over here if you’d like to read it. And if you’re curious about no-till farming in general, I highly recommend checking out the podcast series on No-Till Growers.com.
With this new determination to not disturb the soil at my farm in mind, tulip planting became a bit of a puzzle. Digging a four-foot-wide trench six-plus inches deep for hundreds of feet along my planting beds was pretty much the worst-case scenario in terms of maintaining soil structure and the soil food web in that space. So, I went seeking inspiration for a no-till tulip planting technique.
I found that inspiration in two places. One came from the ever-generous duo, Tony and Denise, at Bare Mountain Flower Farm, who have helped me out with more than a few no-till flower farming questions this season. They have some videos of their no-till tulip planting along with several other great videos on their YouTube channel, which you should go watch after you finish reading this article. So grateful for all that Tony and Denise share!!
I was also reading Gabe Brown’s book, Dirt to Soil, earlier this fall, and was intrigued when I stumbled on a brief mention there that he plants potatoes on the soil surface and then covers them with thick straw/hay (rather than digging into the ground at all) and they grow just fine that way! Tulips and potatoes have a lot in common so I figured that was a good indication that it wouldn’t be so hard to develop a no-till tulip planting technique of my own.
No-Till Tulip Planting
Rather than digging down and disturbing the soil to create a trench, we went UP with a temporary raised bed system. (Our soil is naturally well draining so we’ve never needed to use permanent raised beds here.) Not wanting to disturb the soil at all meant we couldn’t fill the raised beds with soil from our farm. We’ve been using a lot of high-quality, aged, screened compost on the farm already this season in our preferred no-till bed technique of deep mulching. So it seemed natural to look at that compost yet again for no-till tulip planting.
If you’d like to try no-till tulip planting too, here’s how we did it:
Supplies
– “Decking” lumber boards (decking lumber is cheap; I used the 6” wide by 10’ long boards)
– 12” rebar stakes (2 per board)
– Mallet/hammer/heavy rock
– Lots of high-quality, aged compost
– Straw
– Organic soil amendments (optional)
– Old drip tape (optional)
– Grease Marker (optional)
– Staple Gun (optional)
– Bird Mesh or Rat Wire (optional)
Steps for No-Till Tulip Planting
1. The bed we were using for the tulips this year had previously been in cover crop and then under a tarp for about a month to kill off the cover crop. I wanted to add some soil amendments to this bed prior to putting it into tulip production so the first step was to scatter some cotton seed meal, soil mineralizer, and raw agaraonite over the surface. I used a hard rake to just very lightly scratch these amendments into the soil surface. Then I scattered a little compost (less than a ½”) on top of that to create a cushiony surface for the tulip bulbs to sit on so they wouldn’t topple over.
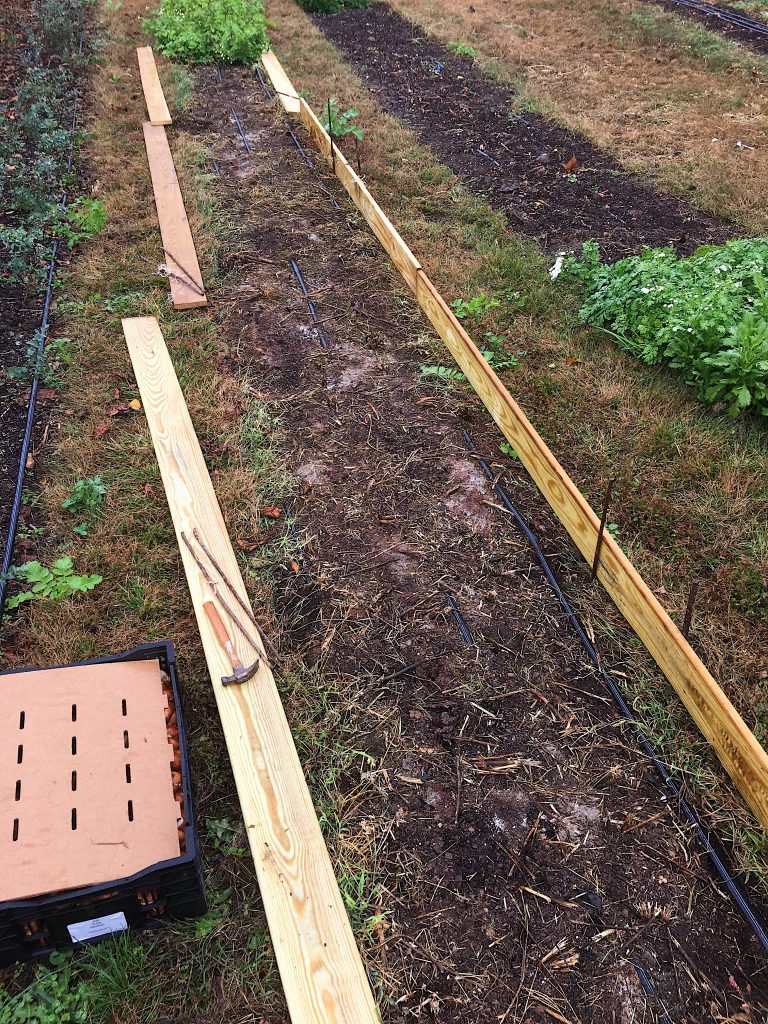
2. I used two rebar stakes per lumber board to get it to stand upright along the perimeter of the bed, being sure to pound the stakes in really well so they would securely hold the board up. If you were trying to save some money and happen to have a wood lot on your farm, instead of purchasing lumber, you could easily build these temporary raised beds out of large fallen branches. You’d also save money by not needing the rebar stakes. Waste not, want not, right? Or, if you are planting in a hoop house, you may not need any “sides” at all on your raised bed of compost. Ours is out in the field though so I didn’t want to risk having heavy rain wash away the compost, exposing the bulbs to the freezing cold.
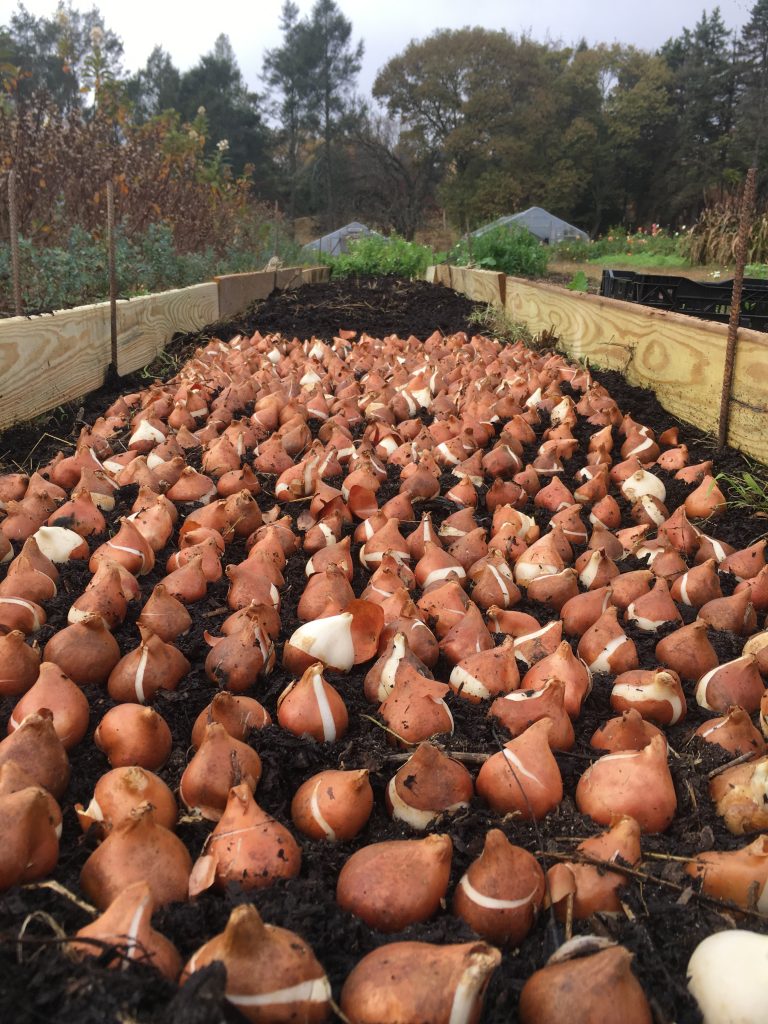
3. Lay your tulips out inside the bed, directly on the ground, being sure to turn them all so their growing points are sticking up. We place the bulbs as close together as eggs in a carton so we can fit thousands into a rather short stretch of bed.
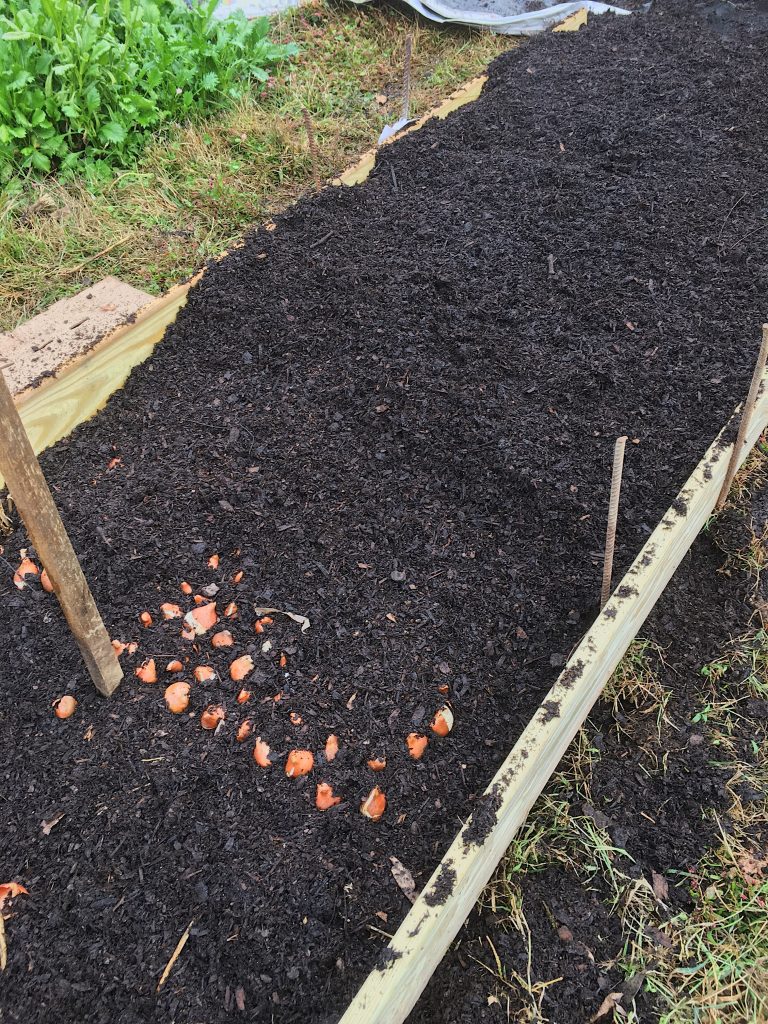
4. Once the tulips are all placed, begin shoveling compost on top, starting with just a gentle scattering at first so you don’t topple over the bulbs. Once the bulbs are snuggled in fairly well, you can start really shoveling with gusto until you fill up the raised bed completely to the top of the boards with compost.
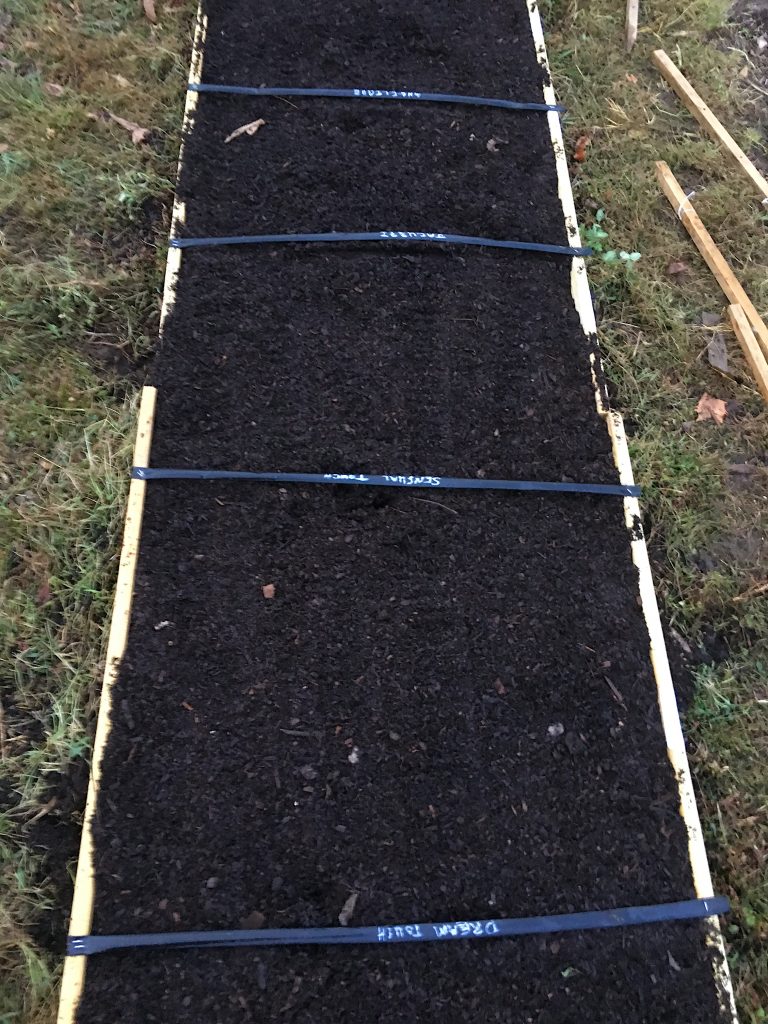
5. I like to label my tulip bed so I know what’s what in case of crop failure or a sneaky supplier substitution that I need to rectify. To do this, I use old drip tape (we always have some we are pulling off the beds around the farm during fall clean up) and a grease marker. With this raised bed system, I was able to use a staple gun to staple down lengths of drip table between each variety of tulip so they’d be clearly labeled. I figured this would also add a little structural integrity to the temporary raised bed so I didn’t need as much rebar.
6. Once the tulips were labeled, I went back over the bed and scattered a thin layer of straw to protect the compost from getting flooded out by the heavy rains we typically get in November.
7. Final step was to staple down plastic bird netting/mesh over the top of the bed to keep our farm cats from digging into the bed (oh, look, new litterbox!) and to keep other small furry critters from digging out bulbs. If you have a real problem with moles/voles/chipmunks/etc, you may want to invest in some heavier protection in the form of metal rat wire.
8. Sit back and wait six months. That’s really the hardest part of this whole process!
So, here’s what I’m thinking after implementing this no-till tulip planting technique:
Pros
– No soil was disturbed! This is a truly no-till technique.
– It was so much faster than digging a trench!!!! So. Much. Faster.
– And so much kinder to our backs!!
– When the tulips are finished next spring, we can use the compost from this bed on neighboring beds, which means less carting around of compost in the spring.
Cons/Concerns
– The lumber and compost are an extra “expense” compared to just digging a trench in the soil. But the lumber can be used year after year and, as noted above, the compost can also be used on another bed in the spring. Also, planting was so much faster that there’s a decided labor cost savings. In the end, when I did the math, it was actually a little cheaper for me to plant this way.
– The tulips might be too cold in the raised bed and freeze (this is a very minor anxiety; I highly doubt this will happen).
– The tulips might be too warm in the raised bed and not flower on long enough stems. Since compost – even aged compost – is actively decomposing, it gives off heat. I’m hoping mine is aged well enough and not too deep that it creates a hot pocket around the tulip bulbs. If this proves to be the case, I can always order pre-chilled bulbs in future seasons, though it will be a very expensive lesson to learn this time around.
– Critters are going to get into the raised bed and eat the bulbs. We don’t typically have any issues with rodents at the farm thanks to two on-patrol tom cats. But in case they get a bit lazy in the winter (they each get their own personal heat mat and plush igloo that they don’t leave on snowy days), I put the bird mesh on top and purposely chose to locate the tulip bed in the middle of our wide-open field where hawks usually circle above and small furry creatures fear to go.
Only time will tell if this no-till tulip planting technique is as good as I hope it to be. So far I’m loving it! As long as our tulip quality is as high as usual in the spring, I’ll be doing no-till tulip planting just like this from here on out! Stay tuned as I’ll be sure to report back in the spring!
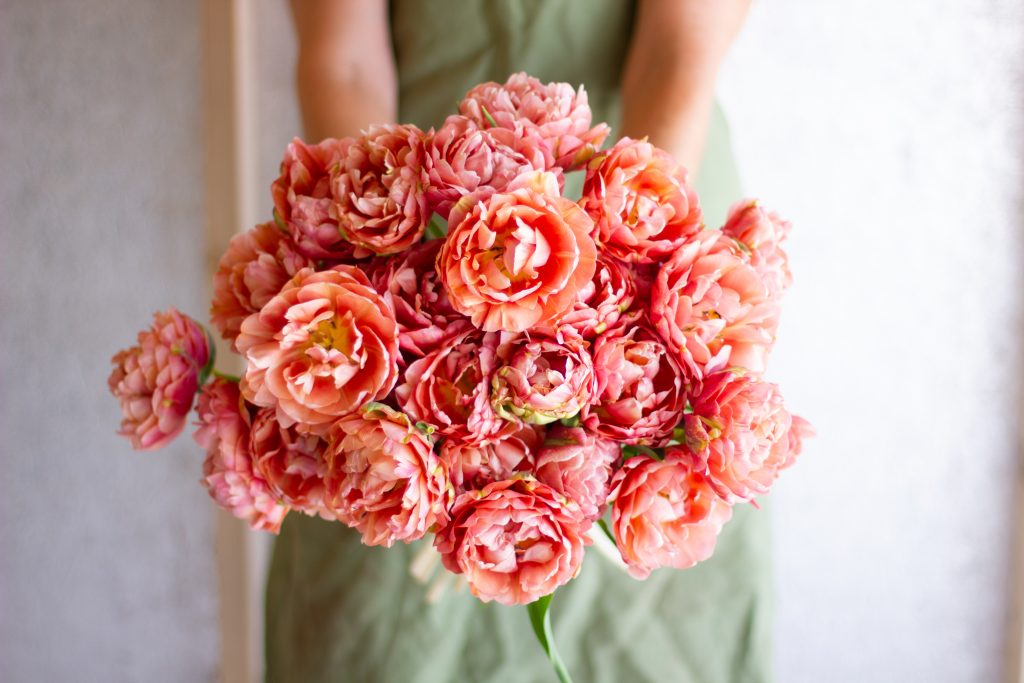
As a quick side note, since I’m sure some of you are curious, the tulip varieties I grow change every year based on what weddings we have scheduled, but two beauties that are always in the mix are Menton and Apricot Parrot. Of the 60+ varieties I’ve tried over the years, I haven’t found a tulip I strongly dislike yet. But I will say that my love of the double-flowered “peony” tulips is waning because the heads snap off the stems so easily during harvest and designing. Back in 2014, I wrote a blog post all about tulips that you might want to give a quick read.
UPDATE:
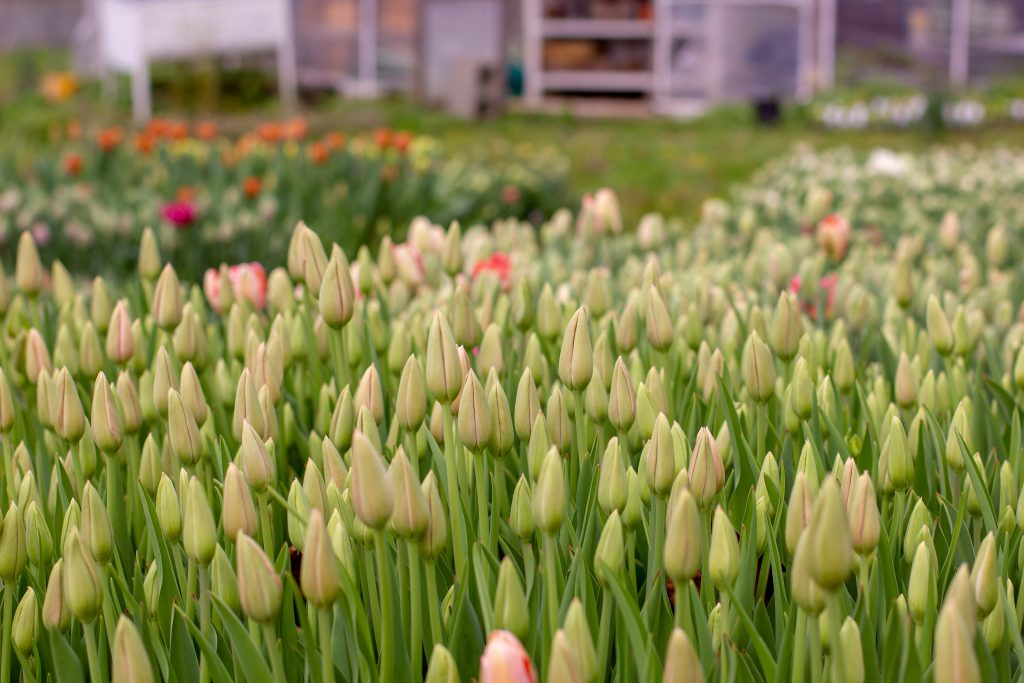
After harvesting these beds of no-till tulips in the spring of 2020, I can happily say I am 100% sold on this system!! The tulips were the best quality we’ve ever had at my farm. Very tall and very straight stems. Harvesting was an absolutely dream compared to pulling tulips out of our heavy soil. In seasons past I would have horrible hand and wrist pain by the end of the intensive tulip harvesting stretch in April because harvesting was so physical. This year, zero hand pain because pulling tulips from compost is so easy!
Bonus! After we were done with the tulip harvest, we disassembled the beds as planned and spread the excess compost on a nearby bed that was being prepped for planting. The beds where the tulips had grown were then immediately planted with summer annuals. The crops in the former tulip beds this summer have been incredibly healthy and robust. I think the soil in those beds is super happy now!
So all around an A+ for no-till tulip planting!
Wonderful! I am 7 years into flower farming and 5 of those are no-till. Way to go! Let me know if you ever come to visit Lennie, my farm is just around the corner.
One of these days I’ll get my butt out to visit you all! Have you done no-till tulips at your farm? Would love to hear about your method!
Reading this as my back is aching from planting tulips in a trench yesterday! I will.
be eager to hear how this works for you. I have stopped growing parrot tulips because the heads snap so easily- sometimes during harvest!
Thanks for sharing. This is exactly how I use to plant tulips with disappointing results. ( we can have warmer winters) I have since gone to pre- chilled tulips. So really excited to try this method again! Soooo much faster.
Thank you so much for the information! I am going to try this method….I still need to plant my bulbs. I’ve been worried about critters and this is my first year with tulips 😬.
Perfect timing! I have been trying to psych myself up to get my tulips planted – definitely going to give this a try. Thank you so much for such a great post … and for ALL the much appreciated information and beauty you share!!
So glad to read this. I did a little experiment with 20 bulbs last year where i just set them on top of the soil and dumped compost on top. But with nothing to hold the compost the snow and rain washed it away partially. Bulbs still bloomed but not great. Will try again today. Instead of wood, I am going to use partial straw bales. So glad to see no till posts!!
We have drainage issues here. So about 10 years ago I started planting bulbs above grade where the ground is flat.
Ours are mainly in permanent beds and mainly daffodils. It has worked perfectly. I do have to add a little soil the summer after flowering as we get settling over the winter. But we’re usually adding more anyway.
How cold does it need to get and for how long in order for tulips to get a good length on them?
There is a lot of science to it and I’m not sure I’d be the best at explaining it. I’m sure a Google search will pull up some useful information and if you’re a member of the ASCFG, you can find that info in the members section. Sorry I can’t answer the question more thoroughly…it’s just not my area of expertise and it’s full of details. 🙂
Fascinating! The trench digging part is the worst and something I’ve been brainstorming how to avoid ever since I dug my first trench. Were your concerns about the heat of the compost realized or did you manage to get nice long stems?
Had great stem length! This is the only way we will be planting tulips from now on! 🙂
Hi Jennie – thanks for sharing this great content! How do you efficiently dispose of bulbs at the end of the season/flip the bed to the next crop? This is my biggest head scratcher for all crops as I try to transition to no-till.
Thanks for the comment, Betsy! For the no-till tulip bulb beds made with compost, most of the bulbs easily came out at the time of harvest so they were disposed of on the compost pile at that point. When we were ready to flip the bed, we simply fished through with a rake to find the remaining bulbs. We moved the compost that was used in this no-till, temporary raised bed system for tulips to another row where we were planting at the time. And then the boards for the raised bed were dissembled and we planted another crop into the spot where the tulips had been immediately after that. It was all a very quick and efficient process. Hope that helps!
Super helpful!!!
I am very glad I found you and looking forward to reading more. Will be following.
Would you apply this to other spring bulbs? (Narcisuss, Iris, Muscari, Lilly) I’m just starting a rather large garden (or tiny farm) to better self-supply my floral design company. Another quick question on no-till-I have that Bucks County clay soil… is it even possible?!?
It should totally work! Both for the other bulbs and for your clay soil. No-till is actually used a lot by farms that have heavy clay since it improves the soil tilth over time, whereas tilling makes clay soils even more compacted/dense. Good luck!
Thanks for the info Jennie!
Curious what your process after tulip season was for that bed?
I am in northern lower Michigan, zone 5, but in the water so temps are kinder here. We certainly get below freezing at times but more like 10-20 degree winter temps. Do you think it can work here? Would love to get away with not digging the trench. Love this udea
Not sure, but maybe you could try a tiny bed like this to experiment and then you’ll have more confidence to do a lot more in the future if they seem to do alright.
Hi, this looks great and so much easier than a trench! Did you remove the netting before the plants emerged? It seems it may be a hassle to pull the bulbs through that netting. Thank you!
Yes, the netting came off as soon as I saw green tips emerging from the soil. At that point the squirrels weren’t going to bother with the bulbs so it wasn’t needed any more.
Hi Jennie , I am using your method of No Till Tulips. The tulips are just coming up on 02/03/2023 , after moving a bit of straw and checking their progress this morning. I was wondering if I should remove the straw? I put it on pretty thick.
Was curious about how using partial bales of hay worked for you?
Not much at all. Can’t say I remember exactly how much, but it’s just a very thin layer.
This is so encouraging and has been the greatest resource I’ve found on this topic so THANK YOU!
First question – I am in zone 6b in Jackson, MO – so do you think that it will be okay to plant the bulbs straight up rather than them being pre-chilled? I’m just so nervous to do them in raised beds when I read the suppliers comments (https://www.vanengelen.com/never.html) especially with how much money I’m investing in buying the bulbs.
Second question – The land I’m leasing has issues with voles. Do you think I need to put metal rat wire on the bottom of the bed as well as the top? Do you know if they would burrow through the bottom of the soil to eat the bulbs or is it only the top?
Thank you again!
You should have no trouble at all with bulbs not being pre-chilled. I’ve never purchased pre-chilled bulbs and I’m zone 7 here.
I would think putting hardward cloth/rat wire down at the bottom of the beds would be a worthwhile investment if you’ve got lots of voles. I haven’t had any issues with voles here since I have two “stray” tom cats that prowl the farm constantly (highly recommend having farm cats!). So I’m not sure I’m the best resource for answering your vole questions. But I do put plastic netting on the top of beds to keep squirrels from digging in them!
Jennie, what kind of compost do you purchase? We are starting a cut flower garden using no til and I’m having trouble sourcing it and any help would be soooo appreciated!! You have truly helped and inspired me in my journey!!
We purchase compost from a nearby professional composting facility that creates a beautiful blend from food scraps, animal manures, wood chips, and leaves. They provide test results once a year so we can be sure it’s well balanced. I’m not sure how to help you find compost in your area though. Your best bet would be to find a farming group local to your community and ask around in that group. Compost is not something you want to be trucking very far.
I used to grow tulips in raised beds before we moved to this farm. I don’t know why I thought I had to trench them in just because we grow thousands more… It’s so reassuring to know that it works on a larger scale. One more for no-till flowers and minimizing wear and tear on grown up lady bodies!
Jennie, I’m excited to be trying your method this fall. Question about compost: we have access to plenty of partially-composted goat manure…will this be harmful to the tulips while everything chills out over the winter? Or should I go find another source for the compost? Thanks!
If the manure is only partially composted, I think it may be too hot still to use on the tulips. Manure will continue to generate heat while it decomposes. You want the tulip bulbs to get cold so that seems counterproductive to me. I’d find another source if I were you.
Hi Jennie, I’m wondering if I would need to put down the cardboard that you’ve mentioned in other posts for Tulips or would that prevent them from reaching the soil below? I’m planting on land that has not been broken for years and has grass on it now. Thanks!
Hi Jennie, I’m wondering if I would need to put down the cardboard that you’ve mentioned in other posts for Tulips or would that prevent them from reaching the soil below? I’m planting on land that has not been broken for years and has grass on it now. Thanks!
I would not put cardboard down at this time for the tulips. The deep compost over the grass is going to likely kill it anyway and the cardboard could interfere with the tulips. In the spring once you are done with tulips, if the grass seems to still have some vigor, then I would put cardboard down when you flip the beds from tulips into to the next crop for summer.
I love this! I bet this process would work for the trench method of trialing dahlia seedlings also.
I planted my ranunculus and anemones that way this year mainly because I’m lazy, er I mean, no till. Do you save your anemones and ranunculus? Would you ever consider living pathways in your hoop houses? When you mow your living pathways, what do you do with your header line?
Thank you for sharing this method of bulb-growing! I am trying it on a small bed of tulips that were planted this past fall in zone 6b, but further south in Virginia. Little bulb heads just started poking through my compost yesterday. I’m go grateful to you for all the amazing knowledge you share – I would have waited until next fall to start planting if I hadn’t come across your blog. Much appreciated for all of your inspiration!!
Awesome article! I’ve been doing some research for the 2022 season and I’d love to try this in my existing beds. I’m trying to do some projections for how many bulbs I can fit. What was the size of your bed and how many bulbs did you plant? I have a couple 4×24 beds that I’d like to use and I’ve found mixed information on how many to plant per sq ft. Thanks so much for any guidance you can provide! -Sam, Zone 5b, New Hampshire
Thank you for such detailed info! Looking forward to this for fall!
Amazing article. I’m just curious about something. I thought tulips like a nice sandy soil, why would they have done so well in compost? Was it a special compost mixture.
Tulips don’t need sandy soil to grow well. They do, however, need a loose growing median. Compost is a nice fluffy loose material so they do great in it. It’s not a special mix of any kind. Just good quality compost.
What is the name of the orange double tulip in the 2nd pic?
That is Copper Image.
What do you do with the spent tulip bulbs you pull out? I have read that they aren’t good for cur flowers after the first time they bloom because the stems are shorter the second time around. I am not sure what to do with bulbs. I hate to throw anything out that still grows perennial.
We compost them, returning the nutrients to our fields with time.
Jennie-
Thanks for your wonderful article! I have found Tony and Denise’s videos a big help as well.
Have you ever dealt with the dreaded tulip fire? I grow as much as possible on 500 square feet with a focus on spring flowers – mainly tulips but also daffodils, ranunculus and anemones. I feel like I don’t have the flexibility to “rotate” crops every year because of space limitations and I have nightmares about the dreaded tulip fire. Do you find no till helps with this at all?
I’ve never experienced tulip fire here at my farm so I can’t really say for sure how best to handle it in your situation since the space is so small. I do think working with temporary raised beds like I describe in this post would give you a chance to rotate your growing medium if you can’t rotate your crops. But I don’t know if it’s 100% affective against tulip fire.
I am just planning my tulip planting and I’m so glad to have found this! Do you think black, crumbly leaf mold would work in place of compost?
I would think so. Tulips aren’t very picky about what they grow in. 🙂
I wanted to come back and report the leaf mold worked great last year 🙂
Also — to ask a follow up!
This year my county has totally run out of leaf mold, but they still have unlimited free bark mulch available.
Would using bark mulch instead of leaf mold work in the place of compost? Or would that be a bad idea?
Also, forgive me if I am missing something–I read through the entire article and all the comments and can’t seem to find this: how deep a layer of compost do you do on top of the tulip bulbs?
Thank you for the beauty you bring to the world!
Thank you so much for reporting back, Rebecca! That’s awesome to hear about the leaf mold working. Regarding using bark mulch, it might work if the bark is chipped up really small. If it’s in big chunky pieces, the tulips pushing through that extra heavy object may distort their growth. But I’ve never tried it so I can’t say for sure. Just my gut. Regarding depth, my bulbs are 6″-8″ below the surface.
Thank you so much, Jennie! I so appreciate you!!
Great article. Thank you for sharing. If you were starting from scratch on a grass lawn, would you remove the turf first? I’ve been thinking of a) removing the turf b) spreading a little soil improver c) covering this with a little bit of compost (so the bulbs don’t burn) d) placing the bulbs on the compost and then covering with compost. Does that sound right?
Sounds like a great plan!
I am in love with this method, hoping it works in a Philadelphia city lot! Does the farm use the same technique for planting other bulbs in spring, such as daffodils?
How often do you water tulip bulbs after planting?
We have wet winters here so generally our tulips do not get watered during the winter months. We’ll start watering in the spring if there hasn’t been much rain.
Jennie, very excited to do a trial with this method in the fall. Trench digging is not ideal, especially in a clay/silt-loam as on our farm. I’ve done it that way for 9 years (since being introduced to this at your farm!) and am totally ready to try a new approach.
What a great way to plant! I’m thinking about next fall and definitely want to use this method. Would it work to plant annuals directly into this bed after harvesting the tulips without moving the compost?
Annuals will need to get their roots into the “native soil” (the soil that’s below the compost) so to plant into this bed after tulips, I would suggest removing about 4 inches of the compost and leaving about 2 inches in place and then planting into the bed.
Did you use pressure treated decking boards?
I have grass and weeds in the area that I want to try this. Would it be okay to apply a cardboard layer on the bottom and then follow the above directions? Or would it be better to do a 12 in raised bed instead?
Mow the weeds and grass low first. Then you could cover with cardboard and use this method.
I tried this method last year. I’m in zone 5b/6a. Most of my tulips did not come up. I’m not sure what I would have done wrong. Do you think they possibly froze? I can’t imagine they would have gotten too warm. We had snow and a cold winter like our normal winters.
Did you dig down in to find the bulbs and see what they looked like? Were they mushy or dry? Did you water them at all during the course of their growing season? Tulips need a lot of water and sometimes people forget to water them. Also, the quality of the compost you used could have an impact. Like any crop and growing system, there are a lot of variables at play here. I doubt your bulbs froze but I can’t say for sure what caused them not to grow.
Great article thanks 🙂
I wonder did you lift the tulips after they died back and then plant your annuals, or plant your annuals straight on top between foliage ? Thanks 🙏
We pull the entire tulip plant (bulb, leaves and all) at the time of harvest. So there’s not foliage left in the bed once tulips are harvested. But note that we do not plant directly into these bed of pure compost after the tulips are done. We disassemble this temporary tulip bed and spread the compost out on other beds. You shouldn’t be planting most crops into straight compost as they won’t have a balanced environment for their roots to grow properly.
I am so excited about no-till-tulip planting! You ARE A GENIUS! Saves the digging, destruction, and the back! My frame will be sitting on 1/4″ hardware cloth to keep out the voles. After the tulips are over, I am wondering about planting lilies & glads in the tulip bed? There are no worries about the tulips rotting from the moisture the lilies & glads need because the tulip bulbs are already GONE! Then the bed can be moved to a fresh spot next fall. I planning a 3×9 test bed to see what happens. Whatdayathink? It won’t hurt my feelings if you or anyone else think it’s dumb 🙂 I appreciate advice!
That sounds like a great idea! I’ve never tried it but I see no reason why it wouldn’t work. 🙂
Hey! First year of planting tulips for us and we’ve been following your expert advice.
My main question is, do you dig up your bulbs each year?
I know this post has been up awhile- but after finding your podcast Im growing tulips this way as a first year flower farmer!
Question- I decided to also do this for some of my daffodils as an experiment but am wondering if I can grow any of my annuals in these straight compost beds or if the compost needs to be redistributed with other fillers like peat moss and pine bark for year round growing?
Glad you found the post! While bulbs do great in these beds, annuals will need contact with the actual soil, not just compost, to thrive. There was a recent podcast episode about the basics of no-till bed preparation. Give that a listen as it goes into why you should plant annuals into straight compost.
Hi! Quick question: As the season started warming up did you pull back the leaf mulch at all or did you just let the tulips push through? I did your method the past two years with great results WITHOUT pulling it back but this year it’s been so back-and-forth with warm days and below-freezing temps that I’ve been afraid to remove the leaf mulch. They’ll push through when they’re ready, right? I’m not somehow stunting their growth by keeping them tucked away?
I do take the mulch of once they start pushing up. But they should be able to push through on their own. I just like to remove it so it’s not clinging to the flowers when I go to harvest. One less step to clean them up and process them then.
I love this! I’m trialing this year myself. How do you caculate how much soil will be needed in each bed?